7.1 Installation steps for MacOS
STEP 1: Install or update R
To install R, visit cloud.r-project.org to download the most recent version for your operating system. The latest release is version 4.4.3 (2025-02-28, Trophy Case).
Install or update RStudio
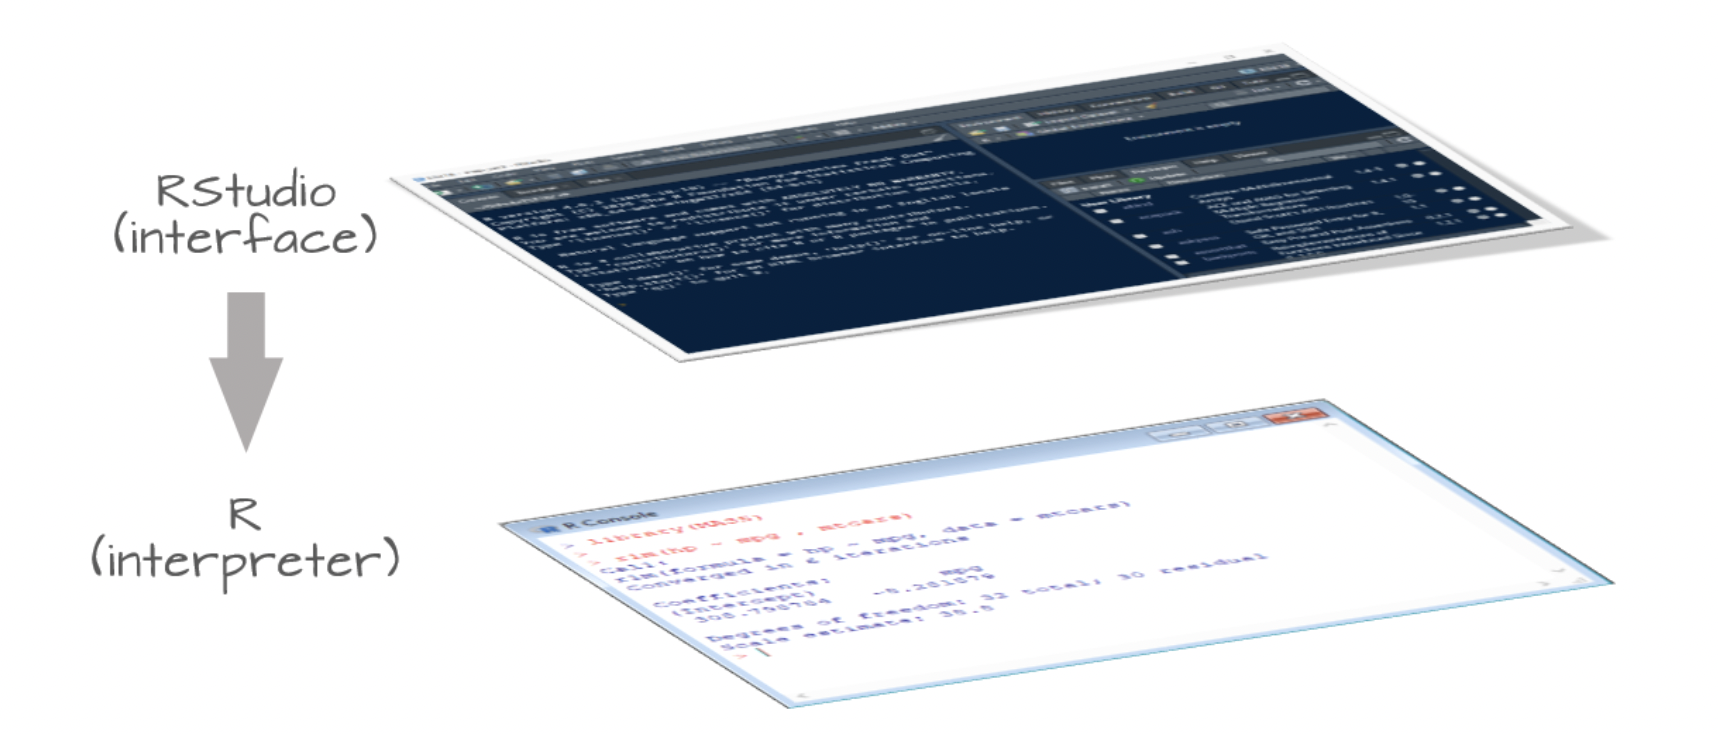
While R is a programming language, RStudio is a software (often referred to as an IDE, Integrated Development Environment) that provides R programmers with a neat, easy-to-use interface for coding in R. There are a number of IDEs out there, but RStudio is arguably the best and definitely most popular among R programmers.
Note: RStudio will not work without R installed, and you won’t particularly enjoy using R without having RStudio installed. Be sure to install both!
New install: To install RStudio, visit https://posit.co/download/rstudio-desktop/. Download the free (“Open Source Edition”) Desktop version for your operating system. You should install the most up-to-date version available that is supported by your operating system.
Update: If you already have RStudio and need to update: Open RStudio, and under ‘Help’ in the top menu, choose ‘Check for updates.’ If you have the most recent release, it will return ‘No update available. You are running the most recent version of RStudio.’ Otherwise, you should follow the instructions to install an updated version (Note you’ll have to download the new version in order to update).
Open RStudio: If upon opening RStudio you are prompted to install Command Line Tools, do it.
Note: you may need to install command line tools and XQuartz.
- To install command line tools (if you’re not automatically prompted), run in the Terminal tab in RStudio:
xcode-select --install - Visit xquartz.org to download & install XQuartz
- To install command line tools (if you’re not automatically prompted), run in the Terminal tab in RStudio:
STEP 2: Check for git
You might already have git on your device, let’s check.
Open RStudio
In the Terminal tab (what is the Terminal?), run the following command:
which git- If after running that you get something that looks like a file path to git on your computer, then you have git installed. For example, that might return something like this (or it could differ a bit):
/usr/local/bin/git. If you instead get no response at all or see something likegit command not foundor “git is not installed”, you should download & install git from here: git-scm.com/downloads
An aside: It is necessary to have Git installed in your machine for this workshop. GitHub’s Git Guides are a really wonderful resource to start learning about this topic.
STEP 3: Create a GitHub account
- If you don’t already have a GitHub account, go to github.com and create one. Here are helpful considerations for choosing a username: happygitwithr.com/github-acct.html.
STEP 4: Install R packages
- Install the
usethisandgitcredspackages in R by running the following in the RStudio Console:
install.packages("usethis")

install.packages("gitcreds")
A lot of scary looking red text will show up while this is installing - don’t panic. If you get to the end and see something like below (with no error) it’s installed successfully.

STEP 5: Connect Git and GitHub in RStudio
The last step to take before you’re all set for the workshop is to get these components talking to one another! You will have to introduce you GitHub credentials to your local computer, using RStudio and then create a Personal Access Token (PAT) on your GitHub account that will allow to transfer the changes you have made to your code in your computer to GitHub. The steps below will guide you on how to get this set up.
In the RStudio Console
Step 1: set the user’s global user.name and user.email and define integrate changes from one branch into another branch for all repositories.
1usethis::use_git_config(user.name = "my_user_name",
2                        user.email = "my_email@nceas.ucsb.edu",
3 pull.rebase = "false")- 1
- Add you exact same GitHub user name. Case and spelling matters!
- 2
- Set up your email address associated to you GitHub account.
- 3
- Setting “merge” as the default strategy to integrate changes from one branch into another branch (for all repos). Check the note at the end of this chapter for more details.
Step 2: define the name of the branch that gets created when you make the first commit in a new Git repo
usethis::git_default_branch_configure(name = "main")Step 3: check to make sure everything looks correct
usethis::git_sitrep()Step 4: Setting up your PAT
- Run
usethis::create_github_token()in the Console. - A new browser window should open up to GitHub, showing all the scopes options. You can review the scopes, but you don’t need to worry about which ones to select this time. The previous function automatically pre-selects some recommended scopes. Go ahead and scroll to the bottom and click “Generate Token”.
- Copy the generated token.
- Back in RStudio, run
gitcreds::gitcreds_set()in the Console. And wait until you are prompted to paste your token. - Paste your PAT when the prompt asks for it.
- Last thing, run
usethis::git_sitrep()in the Console to check your Git configuration and that you’ve successful stored your PAT. Note: look forPersonal access token for 'https://github.com': '<discovered>'
STEP 6: Congratulations!
Once you’ve completed these steps you are ready for our workshop on Git and Github
Need help?
If you run into any issues during this process please check out Happy Git nd GitHub for the useR (great resource from Jennifer Bryan) or more details or contact us to help you troubleshoot.
7.2 Installation steps for Windows
STEP 1: Install or update R
To install R, visit cloud.r-project.org to download the most recent version for your operating system. The latest release is version 4.4.3 (2025-02-28, Trophy Case).
Install or update RStudio
While R is a programming language, RStudio is a software (often referred to as an IDE, Integrated Development Environment) that provides R programmers with a neat, easy-to-use interface for coding in R. There are a number of IDEs out there, but RStudio is arguably the best and definitely most popular among R programmers.
Note: RStudio will not work without R installed, and you won’t particularly enjoy using R without having RStudio installed. Be sure to install both!
New install: To install RStudio, visit https://posit.co/download/rstudio-desktop/. Download the free (“Open Source Edition”) Desktop version for your operating system. You should install the most up-to-date version available that is supported by your operating system.
Update: If you already have RStudio and need to update: Open RStudio, and under ‘Help’ in the top menu, choose ‘Check for updates.’ If you have the most recent release, it will return ‘No update available. You are running the most recent version of RStudio.’ Otherwise, you should follow the instructions to install an updated version (Note you’ll have to download the new version in order to update).
Open RStudio: If upon opening RStudio you are prompted to install Command Line Tools, do it.
STEP 2: Check for git
You should already have git on your device, but let’s check for it anyway.
Open RStudio
In the Terminal (what is the Terminal?), run the following command:
where git- If after running that you get something that looks like a file path to git on your computer, then you have git installed. For example, that might return something like this (or it could differ a bit):
/usr/local/bin/git. If you instead get no response at all or something along the lines “git is not installed”, you should download & install git from here: https://gitforwindows.org/.
Once you have download and installed Git, restart your computer. Then open RStudio and again run:
where gitIf you still get a message saying something like “git is not installed”, check out the Troubleshooting section below.
An aside: It is necessary to have Git installed in your machine for this workshop. GitHub’s Git Guides are a really wonderful resource to start learning about this topic.
STEP 3: Create a GitHub account
- If you don’t already have a GitHub account, go to github.com and create one. Here are helpful considerations for choosing a username: happygitwithr.com/github-acct.html.
STEP 4: Install R packages
- Install the
usethisandgitcredspackages in R by running the following in the RStudio Console:
install.packages("usethis")

install.packages("gitcreds")
A lot of scary looking red text will show up while this is installing - don’t panic. If you get to the end and see something like below (with no error) it’s installed successfully.
STEP 5: Connect Git and GitHub in RStudio
The last step to take before you’re all set for the workshop is to get these components talking to one another! You will have to introduce you GitHub credentials to your local computer, using RStudio and then create a Personal Access Token (PAT) on your GitHub account that will allow to transfer the changes you have made to your code in your computer to GitHub. The steps below will guide you on how to get this set up.
In the RStudio Console
Step 1: set the user’s global user.name and user.email and define integrate changes from one branch into another branch for all repositories.
1usethis::use_git_config(user.name = "my_user_name",
2                        user.email = "my_email@nceas.ucsb.edu",
3 pull.rebase = "false")- 1
- Add you exact same GitHub user name. Case and spelling matters!
- 2
- Set up your email address associated to you GitHub account.
- 3
- Setting “merge” as the default strategy to integrate changes from one branch into another branch (for all repos). Check the note at the end of this chapter for more details.
Step 2: define the name of the branch that gets created when you make the first commit in a new Git repo
usethis::git_default_branch_configure(name = "main")Step 3: check to make sure everything looks correct
usethis::git_sitrep()Step 4: Setting up your PAT
- Run
usethis::create_github_token()in the Console. - A new browser window should open up to GitHub, showing all the scopes options. You can review the scopes, but you don’t need to worry about which ones to select this time. The previous function automatically pre-selects some recommended scopes. Go ahead and scroll to the bottom and click “Generate Token”.
- Copy the generated token.
- Back in RStudio, run
gitcreds::gitcreds_set()in the Console. And wait until you are prompted to paste your token. - Paste your PAT when the prompt asks for it.
- Last thing, run
usethis::git_sitrep()in the Console to check your Git configuration and that you’ve successful stored your PAT. Note: look forPersonal access token for 'https://github.com': '<discovered>'
STEP 6: Congratulations!
Once you’ve completed these steps you are ready for our workshop on Git and Github
Need help?
If you run into any issues during this process please check out Happy Git nd GitHub for the useR (great resource from Jennifer Bryan) or more details or contact us to help you troubleshoot.
7.3 Additional Information
1. Troubleshooting
Issues installing Git on a Windows
If you download Git and the Git commands still not recognized by your computer, check your computer’s PATHS.
To do this, follow the instructions in this link on how to set the right PATHS.
Restart your computer and try running git --version on the terminal. You should get something like git version XX.XX (but with numbers instead of Xs).
If you see the git version printed out in your terminal, you are all set
2. Strategy to integrate changes from one branch into another
Above we configured our global options for all the repositories you create in your server session to use pull.rebase = "false" as the strategy to integrate changes from two branches. With this we are saying to merge changes (as opposed to rebasing).
It is important to highlight that this configuration can be repo specific. This mean, you can configure how you want git to reconciling two branches at a repository level and not “for all repositories”. Allowing you to control on how git weaves things in when collaborating with others.
If you don’t define pull.rebase = "false" when setting the global configurations, you will have to define this for each repository you create. You will likely see the following message after you pull, meaning you have not define how to reconciling two branches in your repository.
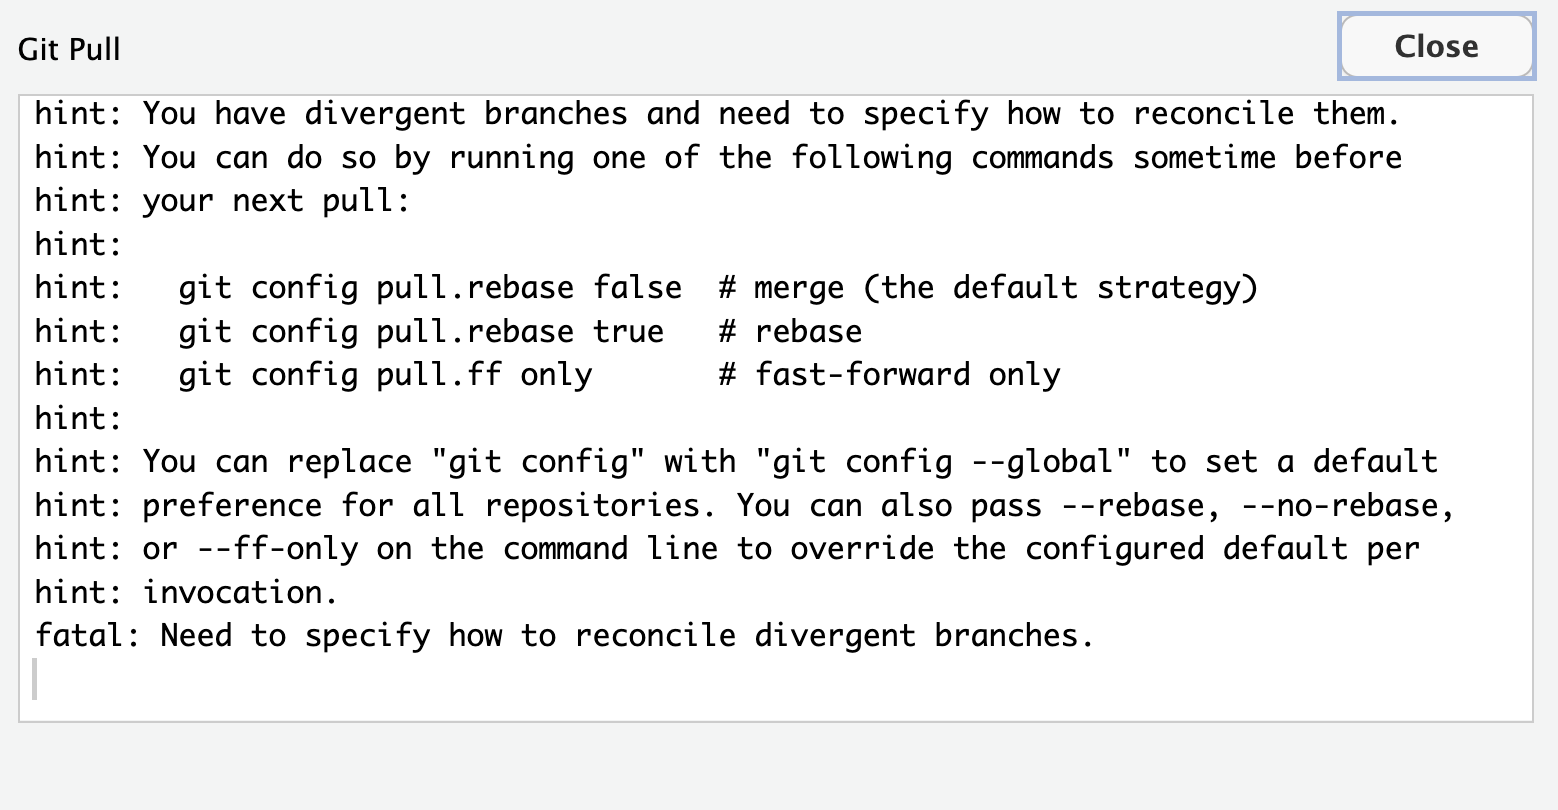
To solve this issues you have to run either of the two suggested strategies on the terminal.
git config pull.rebase falseor
git config pull.rebase true