17 Writing Good Data Management Plans
17.1 Learning Objectives
In this lesson, you will learn:
- Why create data management plans
- The major components of data management plans
- Tools that can help create a data management plan
- Festures and functionality of the DMPTool
17.2 When to Plan: The Data Life Cycle
Shown below is one version of the Data Life Cycle that was developed by DataONE. The data life cycle provides a high level overview of the stages involved in successful management and preservation of data for use and reuse. Multiple versions of a data life cycle exist with differences attributable to variation in practices across domains or communities. It is not neccesary for researchers to move through the data life cycle in a cylical fashion and some research activities might use only part of the life cycle. For instance, a project involving meta-analysis might focus on the Discover, Integrate, and Analyze steps, while a project focused on primary data collection and analysis might bypass the Discover and Integrate steps. However, ‘Plan’ is at the top of the data life cycle as it is advisable to initiate your data management planning at the beginning of your research process, before any data has been collected.

17.3 Why Plan?
Planning data management in advance povides a number of benefits to the researcher.
- Saves time and increases efficiency; Data management planning requires that a researcher think about data handling in advance of data collection, potentially raising any challenges before they are encountered.
- Engages your team; Being able to plan effectively will require conversation with multiple parties, engaging project participants from the outset.
- Allows you to stay organized; It will be easier to organize your data for analysis and reuse.
- Meet funder requirements; Funders require a data management plan as part of the proposal process.
- Share data; Information in the DMP is the foundation for archiving and sharing data with community.
17.4 How to Plan
- As indicated above, engaging your team is a benefit of data management planning. Collaborators involved in the data collection and processing of your research data bring diverse expertise. Therefore, plan in collaboration with these individuals.
- Make sure to plan from the start to avoid confusion, data loss, and increase efficiency. Given DMPs are a requirement of funding agencies, it is nearly always neccesary to plan from the start. However, the same should apply to research that is being undertaken outside of a specific funded proposal.
- Make sure to utilize resources that are available to assist you in helping to write a good DMP. These might include your institutional library or organization data manager, online resources or education materials such as these.
- Use tools available to you; you don’t have to reinvent the wheel.
- Revise your plan as situations change and you potentially adapt/alter your project. Like your research projects, data management plans are not static, they require changes and updates throughout the research project process.
17.5 What to include in a DMP
If you are writing a data management plan as part of a solicitation proposal, the funding agency will have guidelines for the information they want to be provided in the plan. A good plan will provide information on the study design; data to be collected; metadata; policies for access, sharing & reuse; long-term storage & data management; and budget.
A note on Metadata: Both basic metadata (such as title and researcher contact information) and comprehensive metadata (such as complete methods of data collection) are critical for accurate interpretation and understanding. The full definitions of variables, especially units, inside each dataset are also critical as they relate to the methods used for creation. Knowing certain blocking or grouping methods, for example, would be necessary to understand studies for proper comparisons and synthesis.
 The article Ten Simple Rules for Creating a Good Data Management Plan is a great resource for thinking about writing a data management plan and the information you should include within the plan. The ten simple rules are:
1. Determine the research sponsor requirements
If you are writing your DMP in association with a proposal submission, your funding body will likely have specific requirements for your DMP. If you are creating a DMP for your own research purposes, it may be useful to refer to a generic plan or one from a funder aligned with your domain.
2. Identify the data to be collected
Consider the types, sources, volume, and data and file formats.
3. Define how the data will be organized
Will you store you data in excel spreadsheets? csv format? Are your data in a database structure?
4. Explain how the data will be documented
Metadata!! What standard will your be using? How will you create your metadata?
5. Describe how quality data will be assured
What methods or approaches will be taken to assure data quality? Training activities, instrument calibration, verification tests, double-blind data entry, statistical and visual interpretation are all approaches to error detection.
6. Present a sound storage & preservation strategy
How long will the data be accessible? How will data be stored and protected during the project? How will data be preserved and made available for future use? This is where you would include information on the repository that will preserve your data.
7. Define the project’s data policies
What are your licensing and data sharing arrangements? Do you have any human subject or other sensitive data that requires special consideration?
8. Describe how the data will be disseminated
More active, robust and preferred approaches include: (1) publishing the data in an open repository or archive; (2) publishing the data, metadata, and relevant code as a “data paper”.
9. Assign roles and responsibilities
Roles may include data collection, data entry, QA/QC, metadata creation and management, backup, data preparation and submission to an archive, and systems administration.
10. Prepare a realistic budget
Review your plan and make sure that there are lines in the budget to support the people that manage the data as well as pay for the requisite hardware, software etc.
17.6 NSF DMP requirements
In the 2014 Proposal Preparation Instructions, Section J ‘Special Information and Supplementary Documentation’ NSF put foward the baseline requirements for a data management plan. In addition, there are specific divison and program requirements that provide additional detail. If you are working on a research project with funding that does not require a data management plan, or are developing a plan for unfunded research, the NSF generic requirements are a good set of guidelines to follow.
Five Sections of the NSF DMP Requirements
1. Products of research
Types of data, samples, physical collections, software, curriculum materials, other materials produced during project
2. Data formats and standards
Standards to be used for data and metadata format and content (for initial data collection, as well as subsequent storageand processing)
3. Policies for access and sharing
Provisions for appropriate protection of privacy, confidentiality, security, intellectual property, or other rights or requirements
4. Policies and provisions for re-use
Including re-distribution and the production of derivatives
5. Archiving of data
Plans for archiving data, samples, research products and for preservation of access
17.7 Tools in Support of Creating a DMP
The DMP Tool and DMP Online are both easy to use web based tools that support the development of a DMP. The tools are partnered and share a code base; the DMPTool incorporates templates from US funding agencies and the DMP Online is focussed on EU requirements.
17.8 Hands-On: Creating a DMP
Go to https://dmptool.org
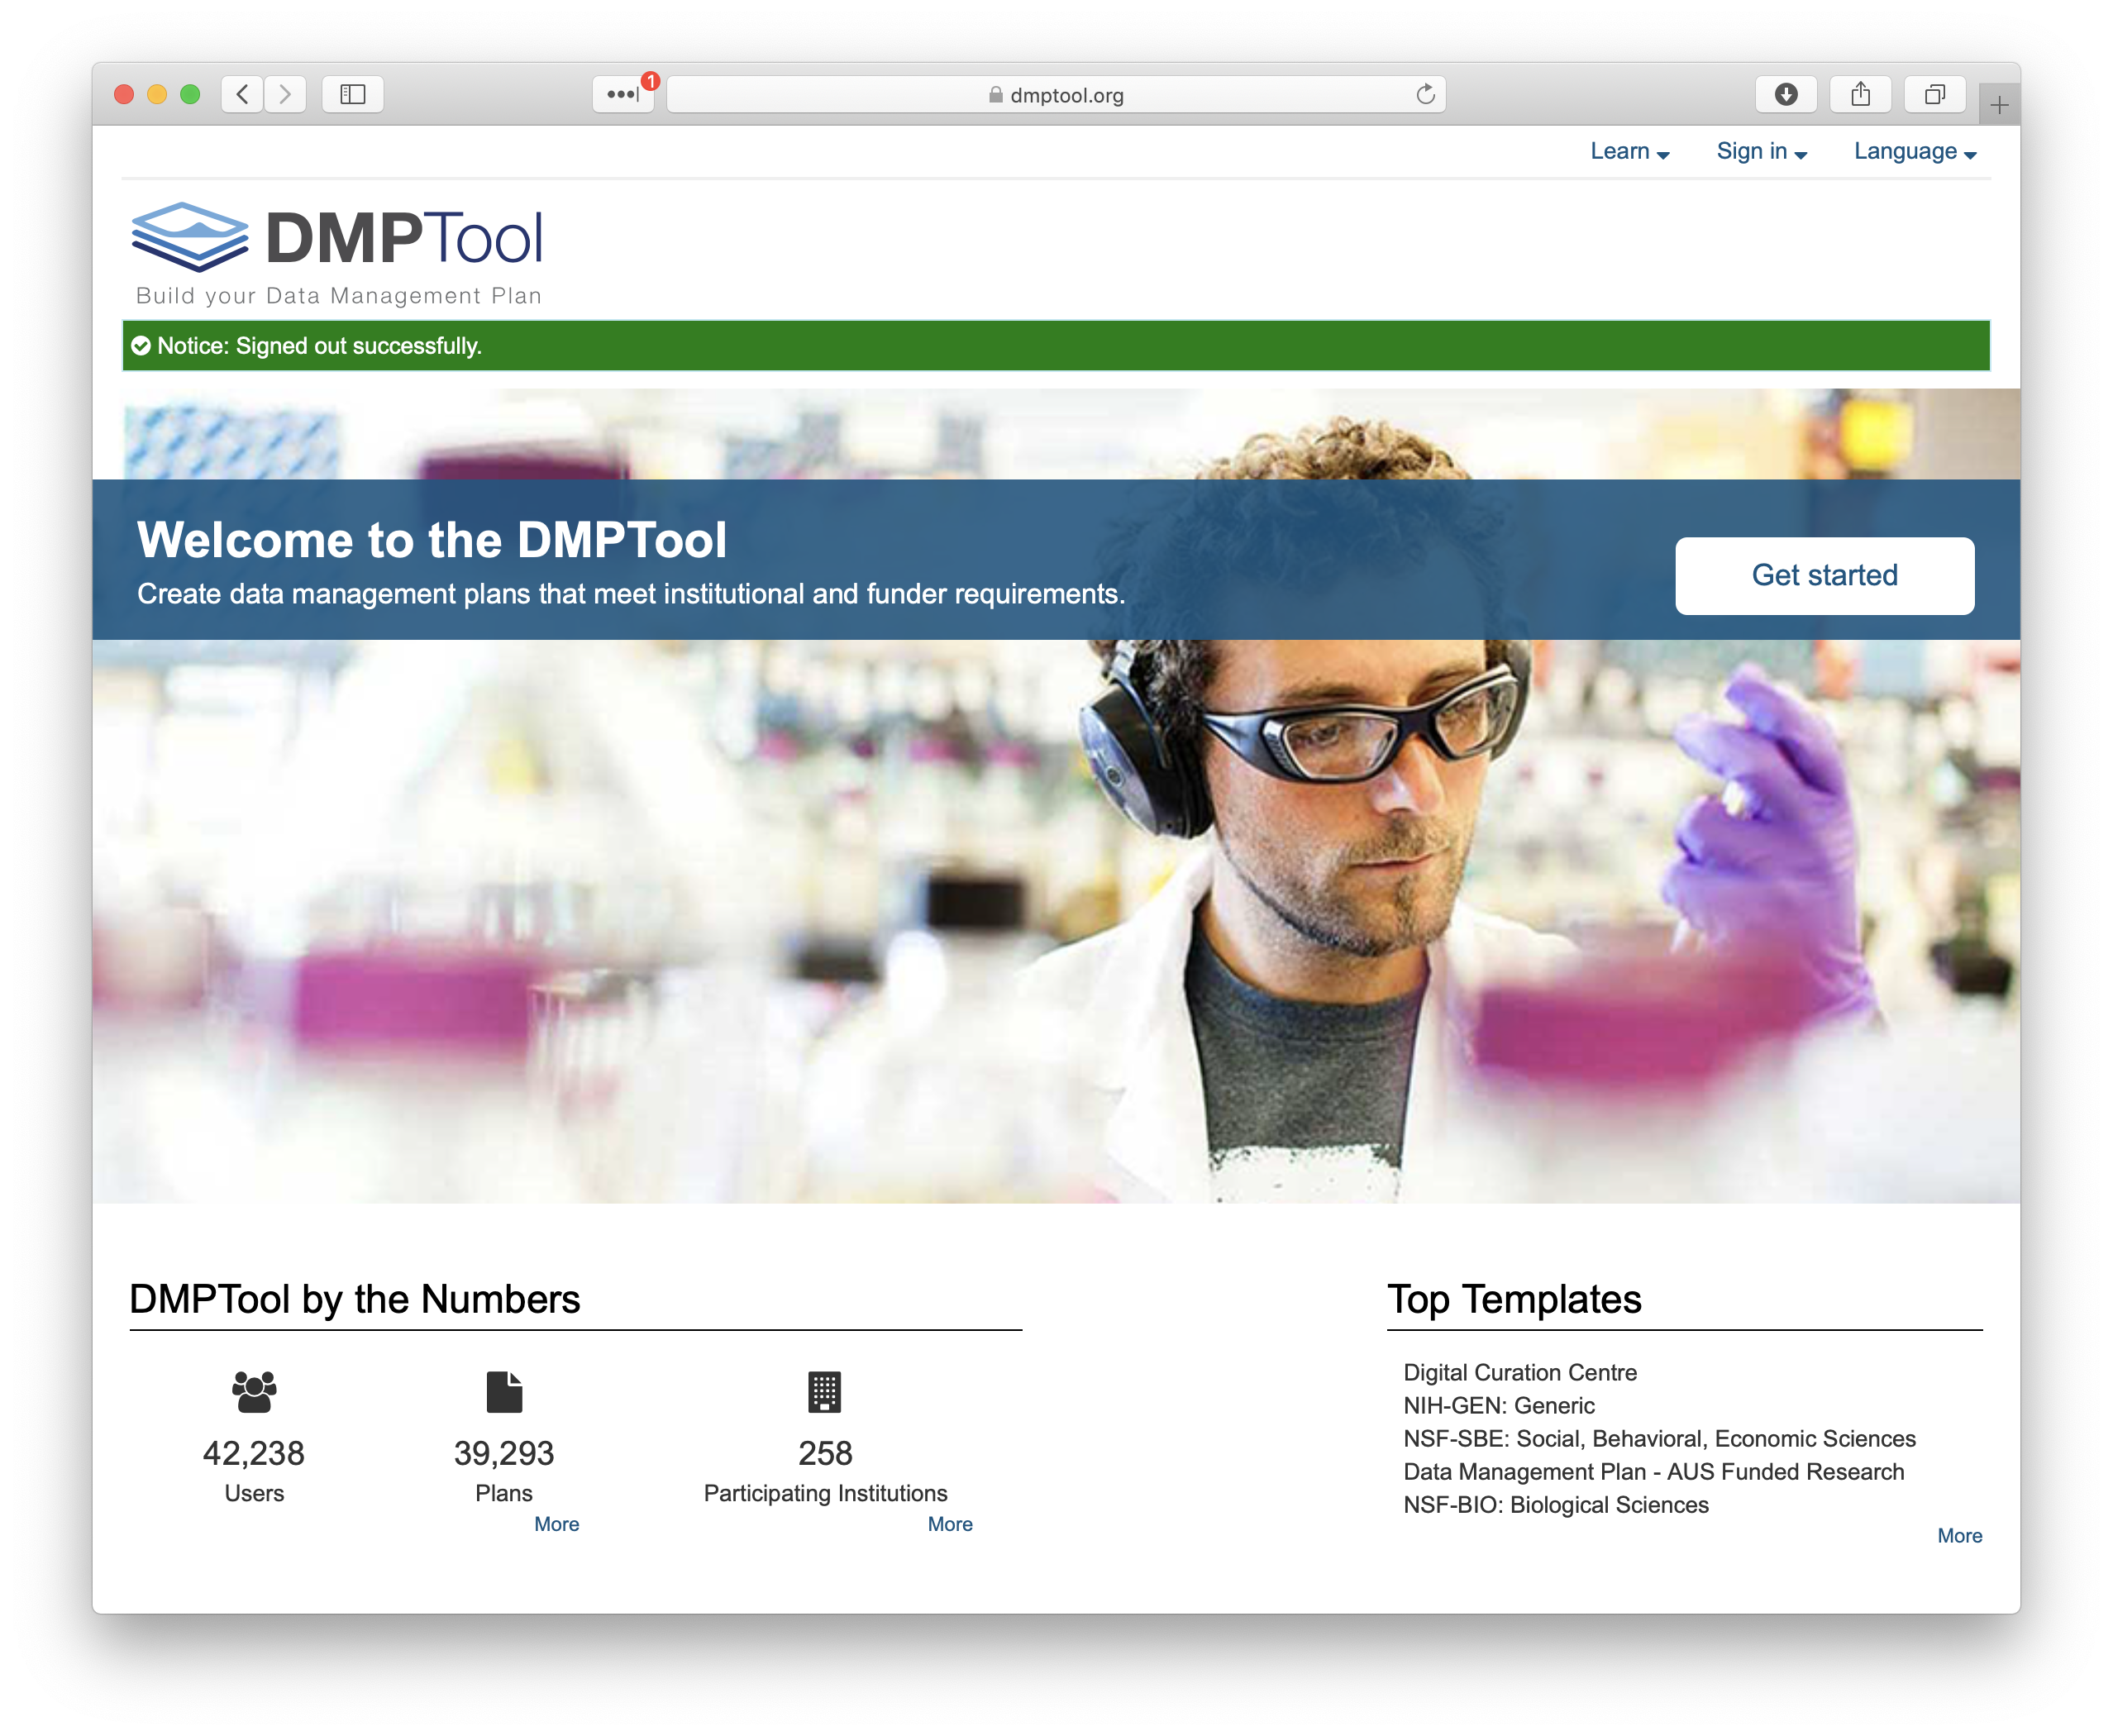
Click ‘get Started’ to login. You will have three options. Options 1 and 2 apply if your organization is partnered with the DMP Tool or if you already have an account, option 3 is in order to set up an account. Under Option 1 you will be prompted to search for your organization and can then log-in using your institutional ID.

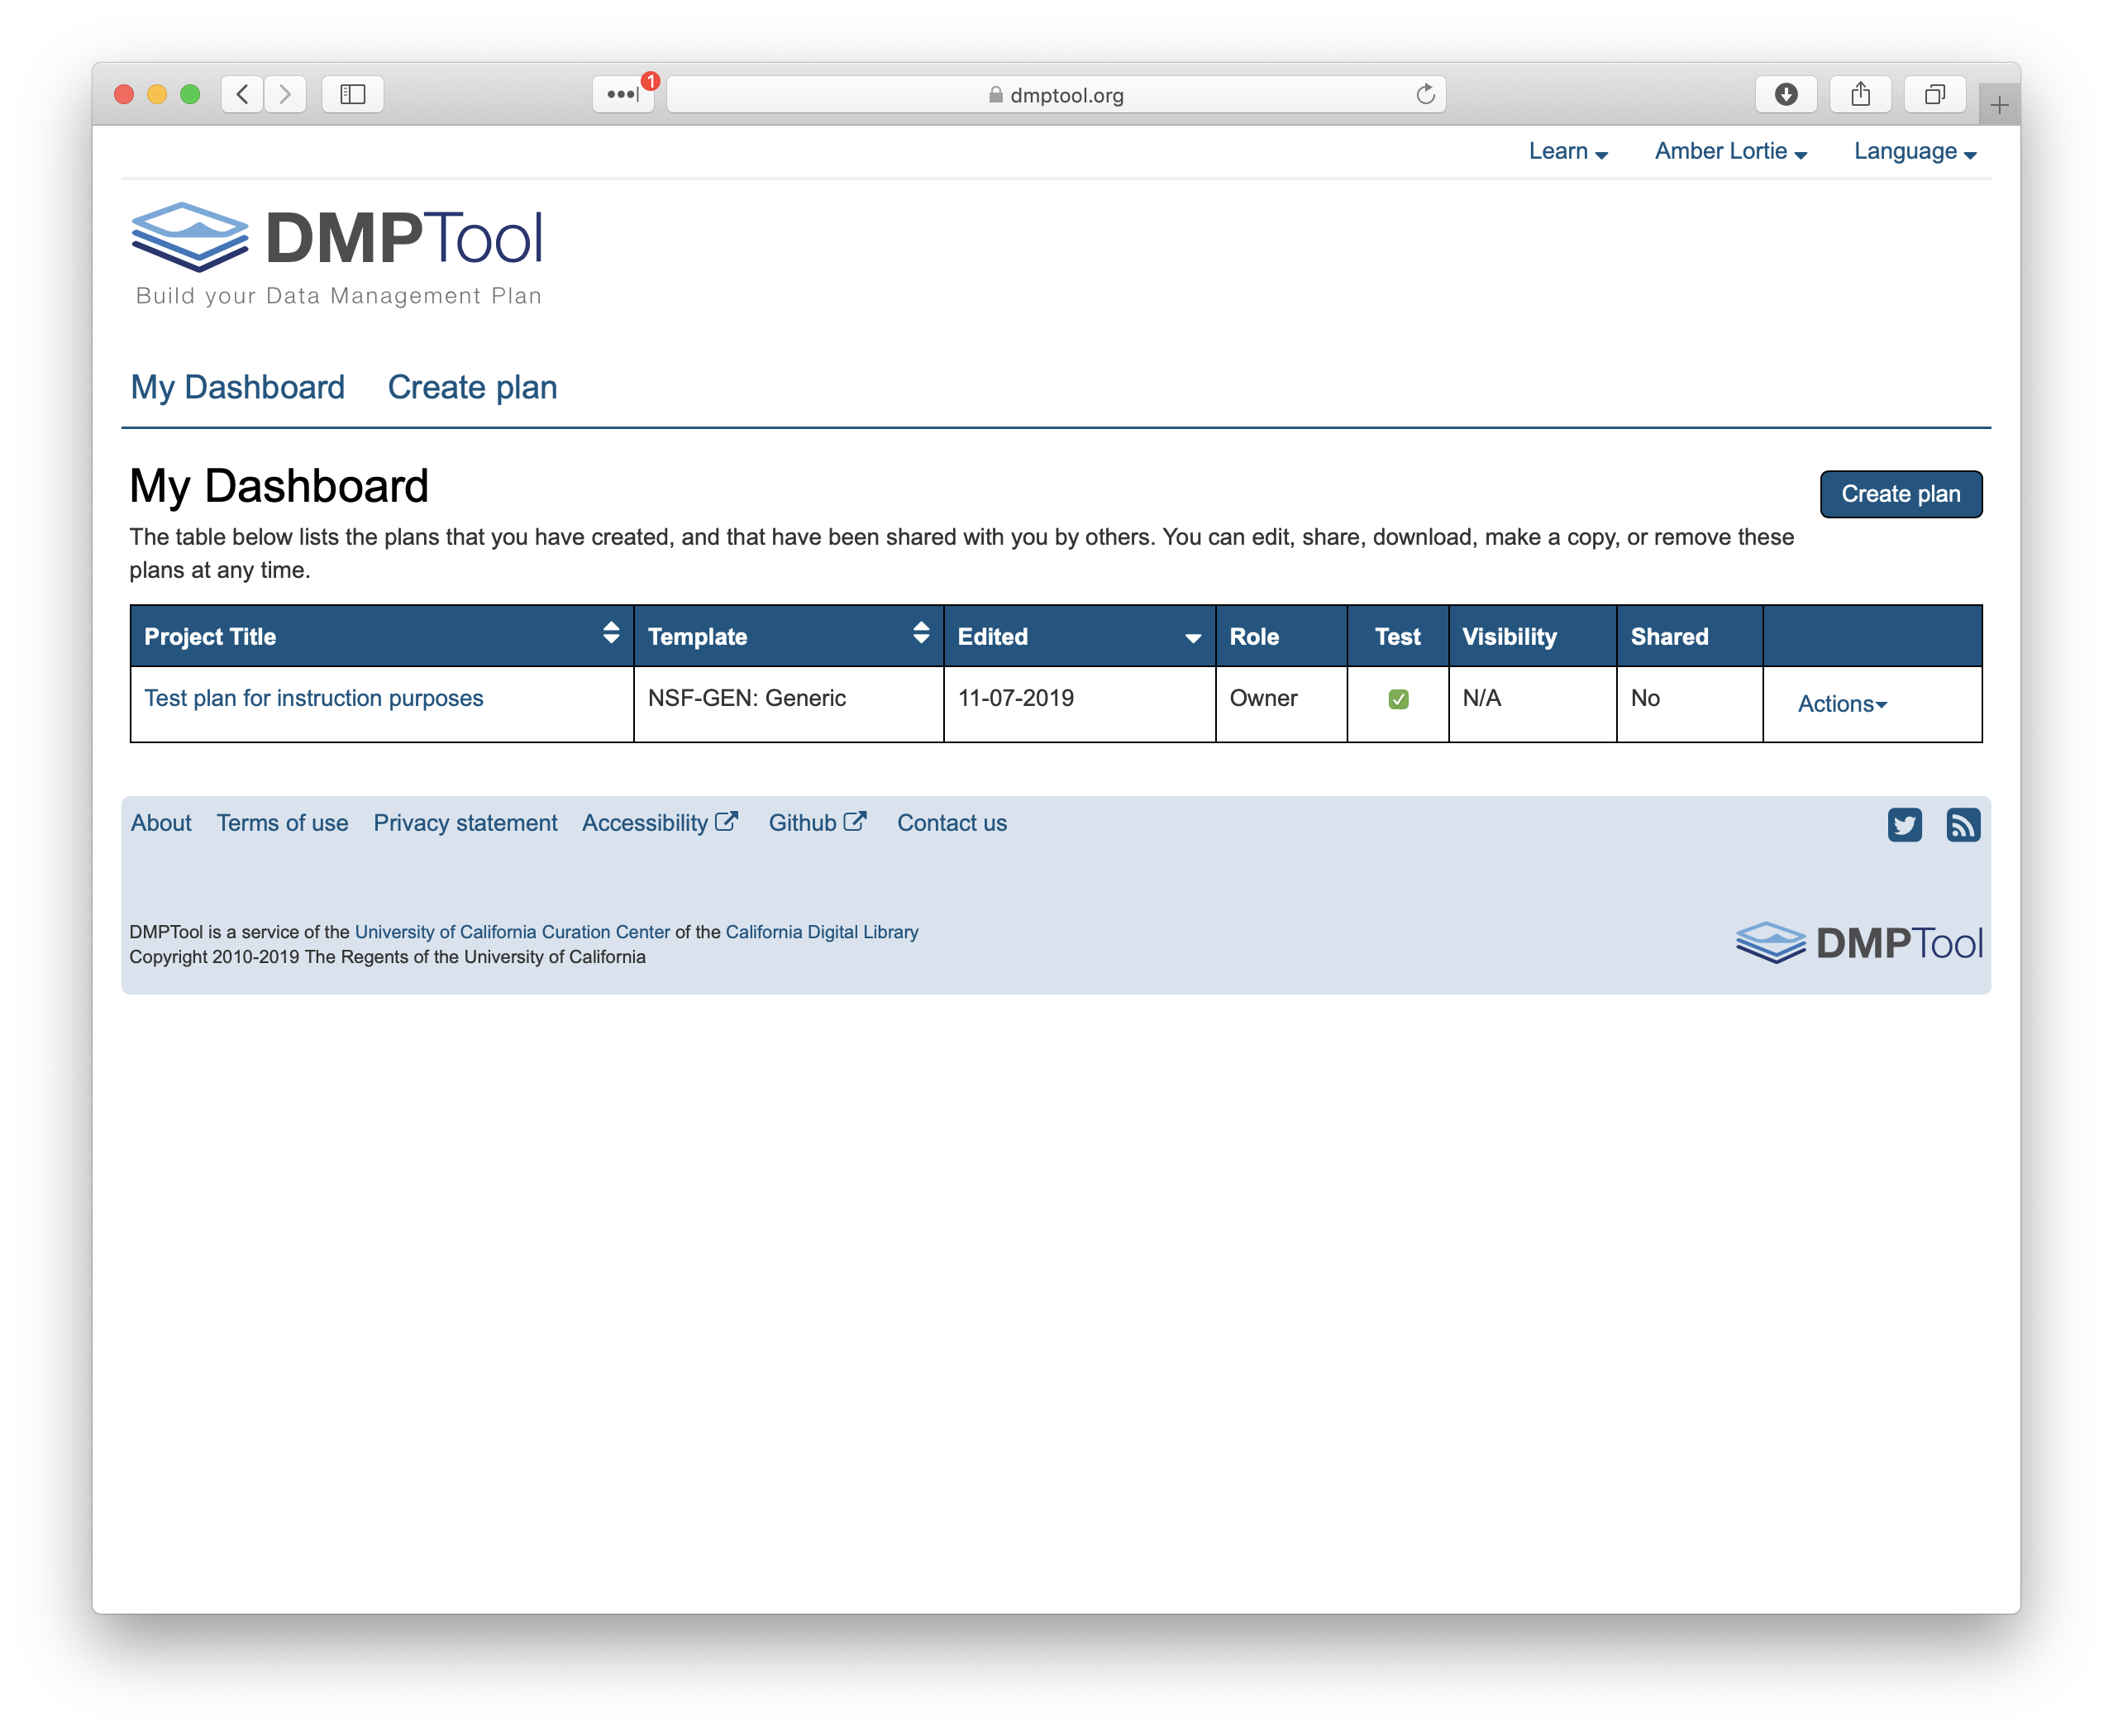
Once logged in you will be taken to your DMP dashboard. Here you will find a list of all the plans that are affiliated with your account.
Before getting started, it is worth taking a look at a couple of resources within the DMPTool that are helpful. These can be found under ‘Learn’ at the top right.
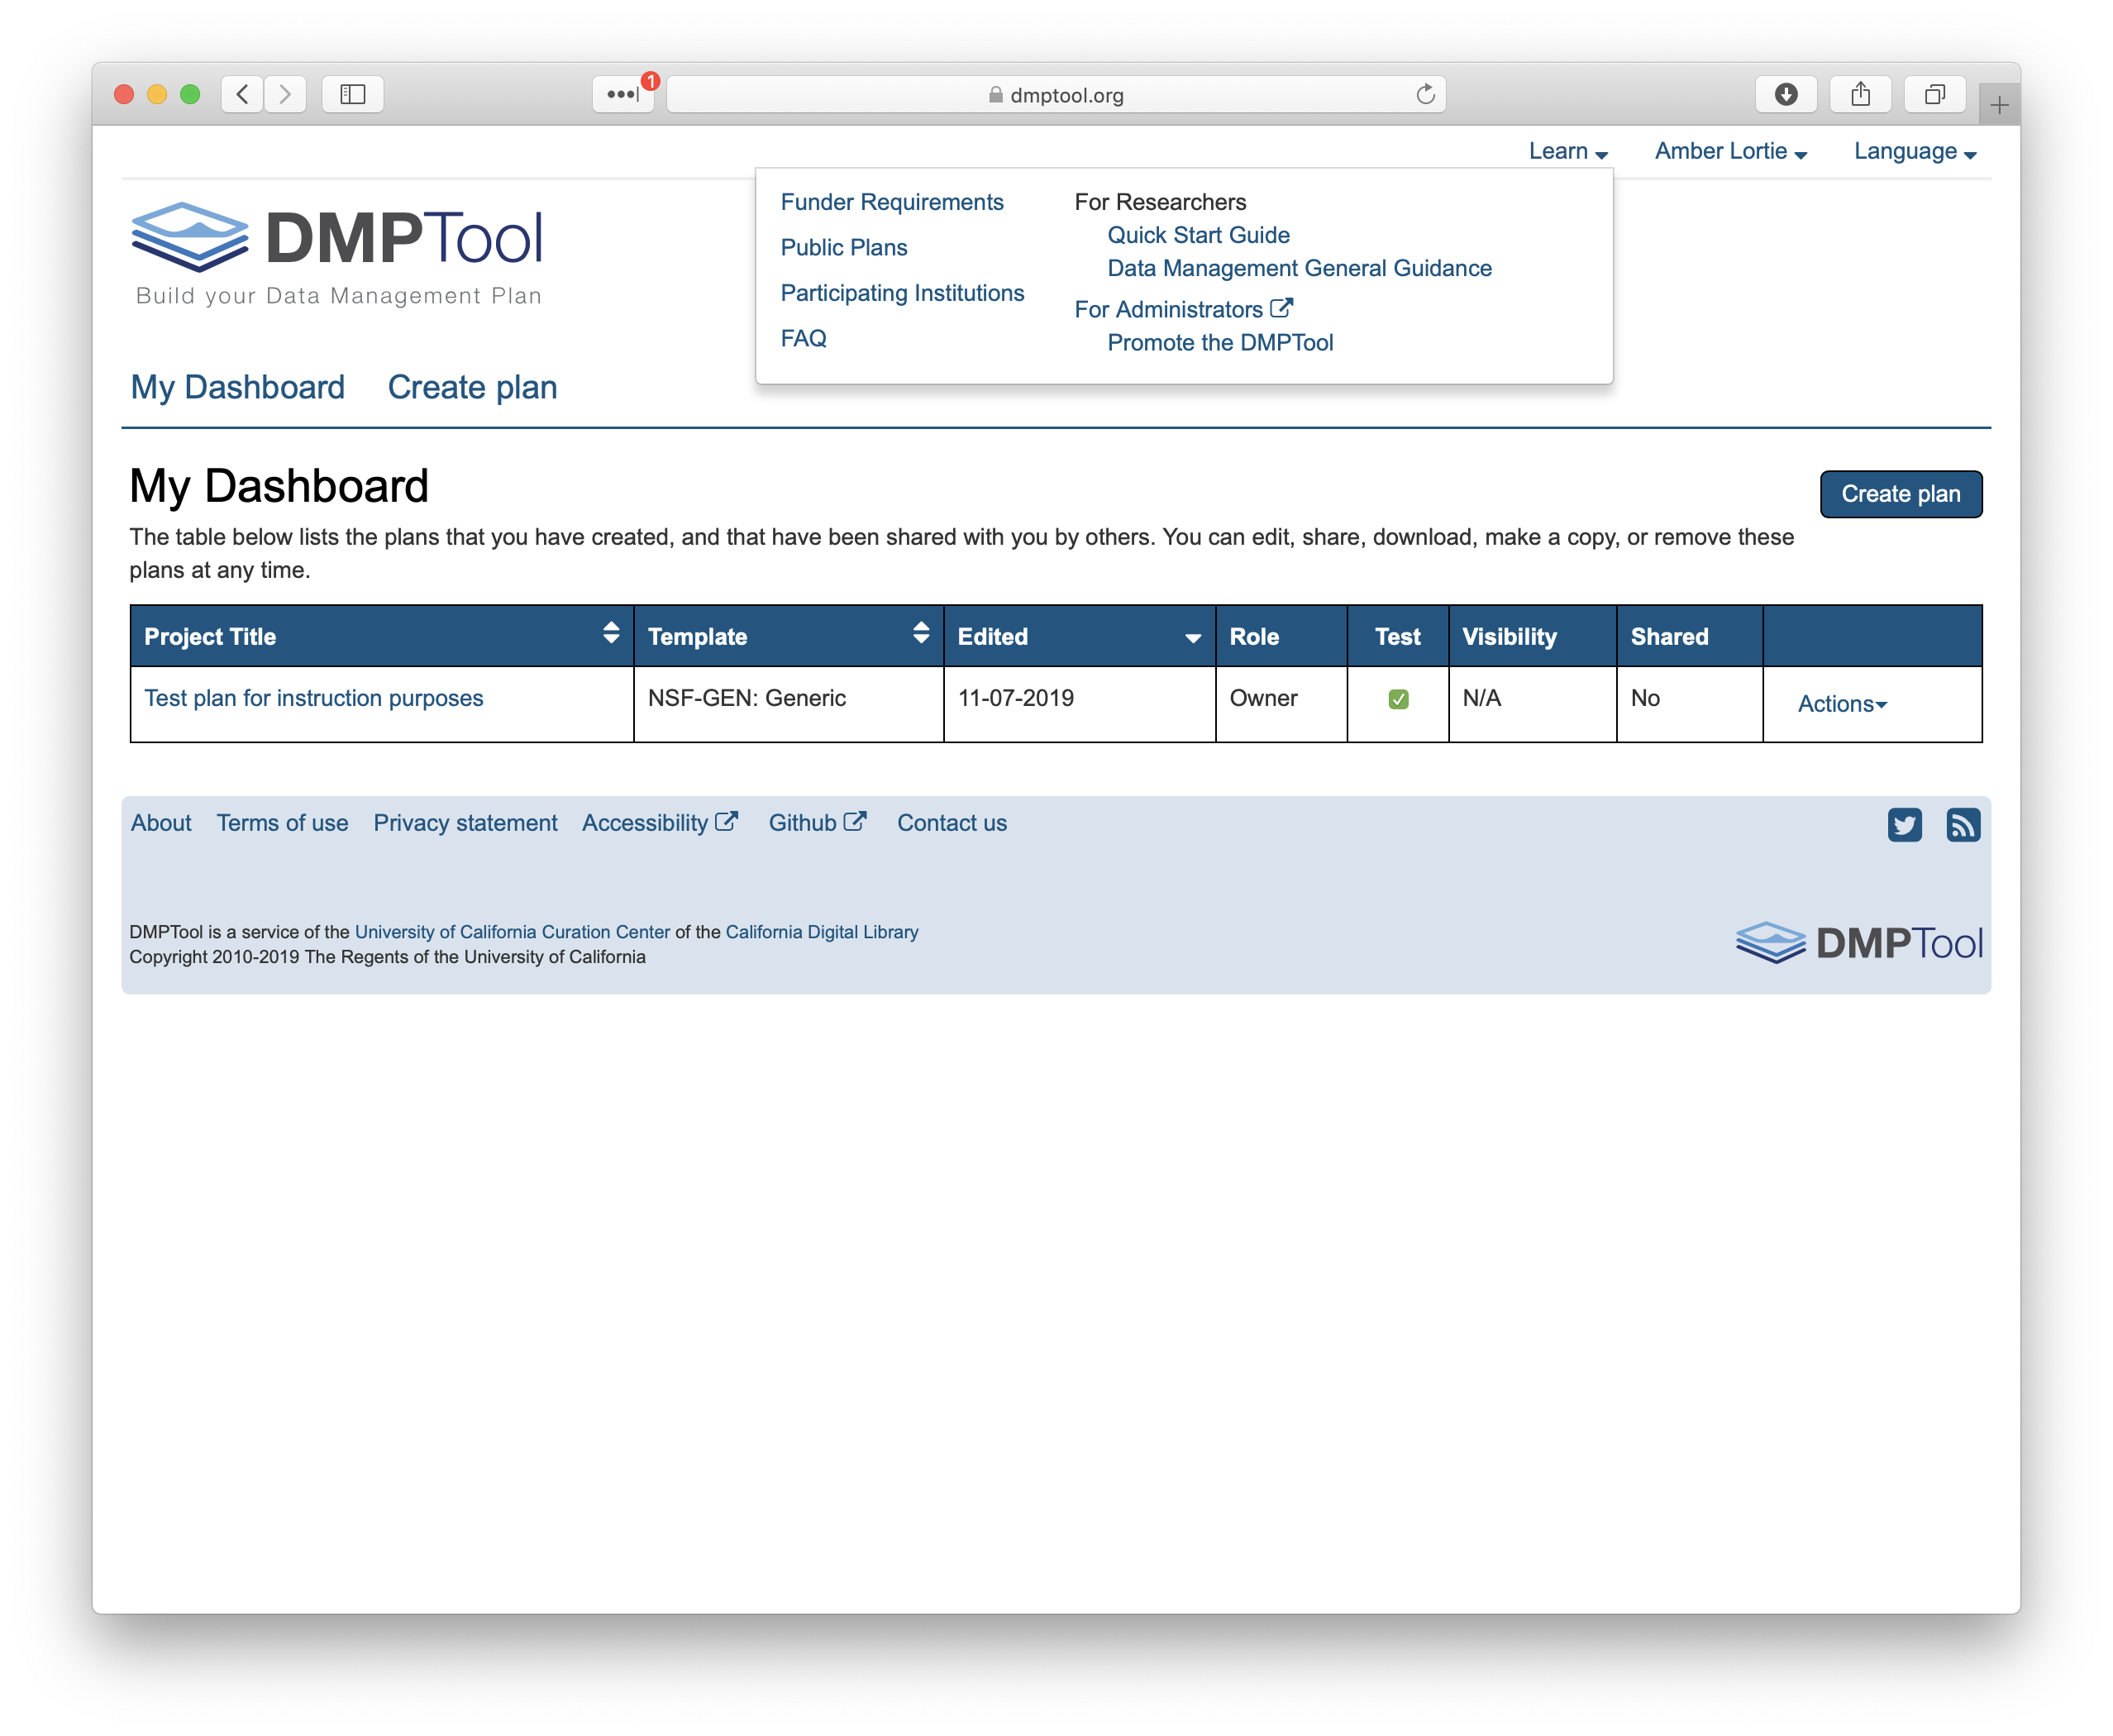
The first is the list of Funder Requirements. This details the full set of funder / division / program DMP requirements that have been converted into templates within the tool. For each set of requirements you can download the template to use outside of the tool, review the date of the most recent update, refer to the oringal guidance directly from the funder website and review sample plans.

Another place to discover example plans is under the ‘Public Plans’ section (Learn>Public Plans). Any plan submitted by a user that was marked as public can be found here. No information is provided on whether these plans were associated with a funded proposal, nor any evaluation of the plan quality. However, they are useful to review if writing a DMP for the first time.

OK, back to your dashboard. To create a new plan, simply click the ‘Create Plan’ button on the right. You may also click on the words "Create Plan’ aover the horizontal line, they go to the same location.
You are now in the DMP Tool editor which guides you through a series of questions in order to complete the plan. The first questions connect your plan to your institution and ensure the correct template is being used.
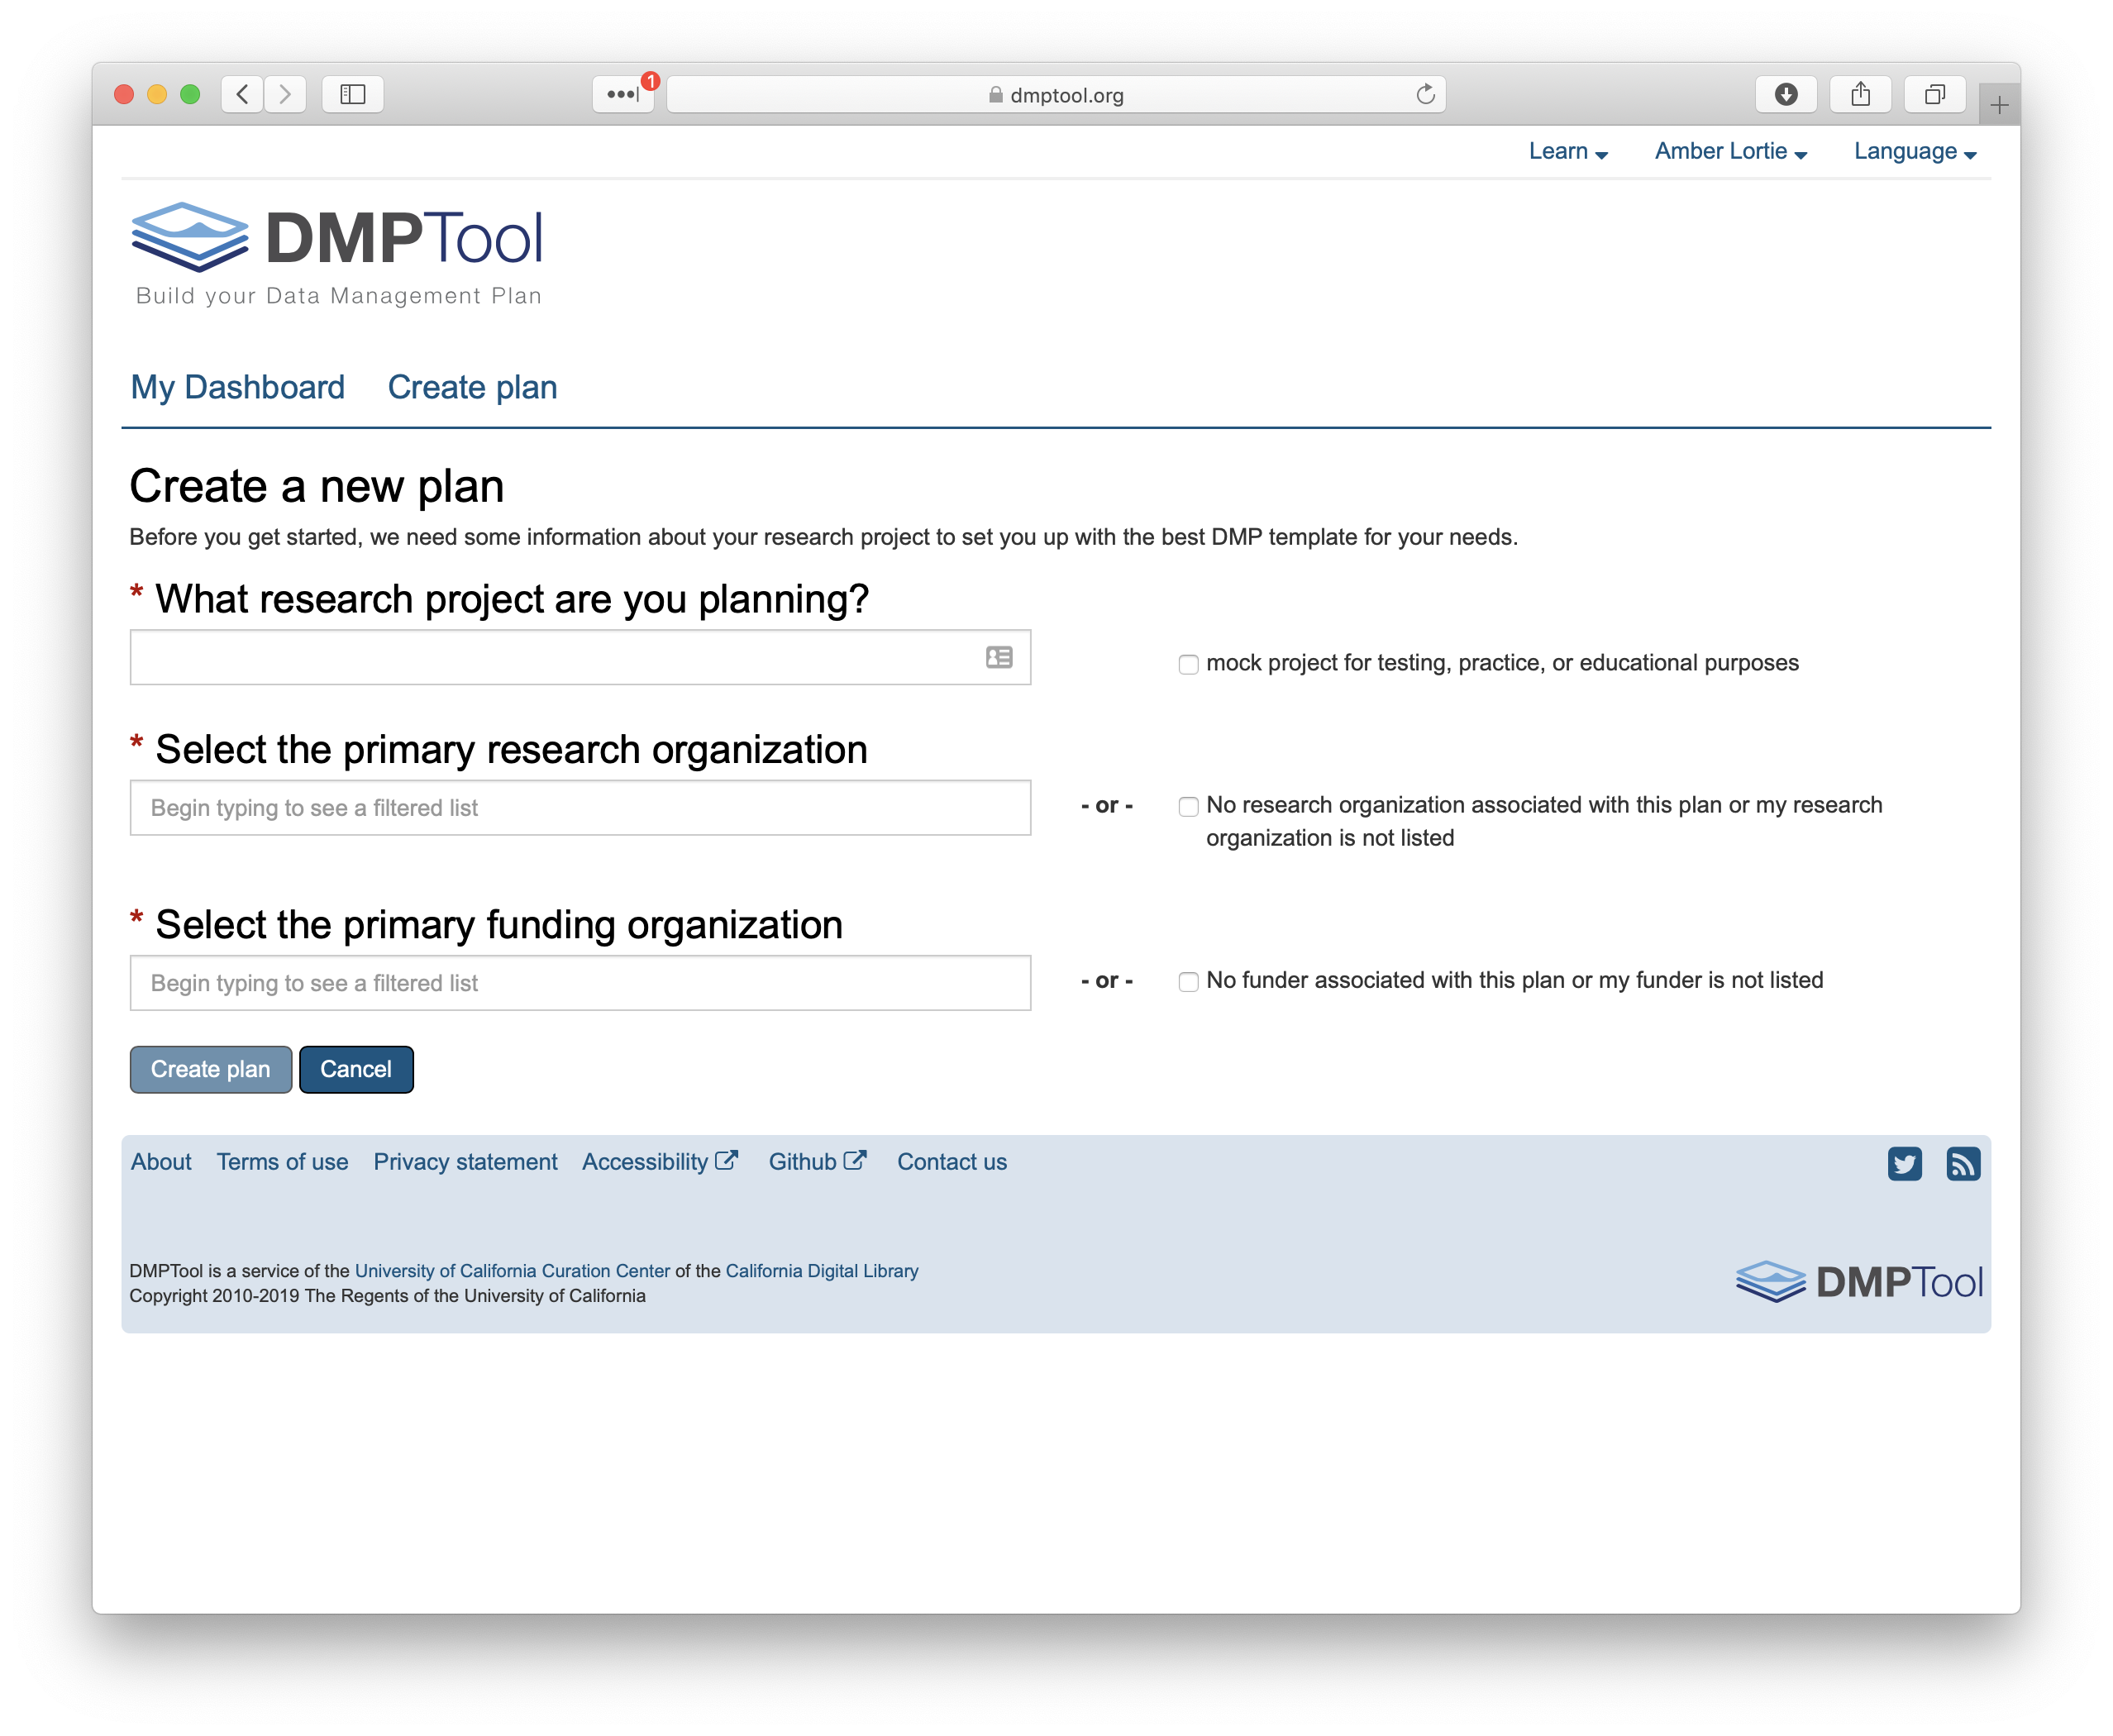
For the purposes of this workshop, when completing the title, also check the box next to it indicating that this plan is a test. This ensures that the plan does not get included in the DMPTool reporting metrics. The boxes for research organization and funding agency will prompt you for affiliations. If there are multiple plan templates for a given funding agency, another box will pop up asking you to select a template from the drop-down list. For this workshop, we are going to use the NSF: Generic template.
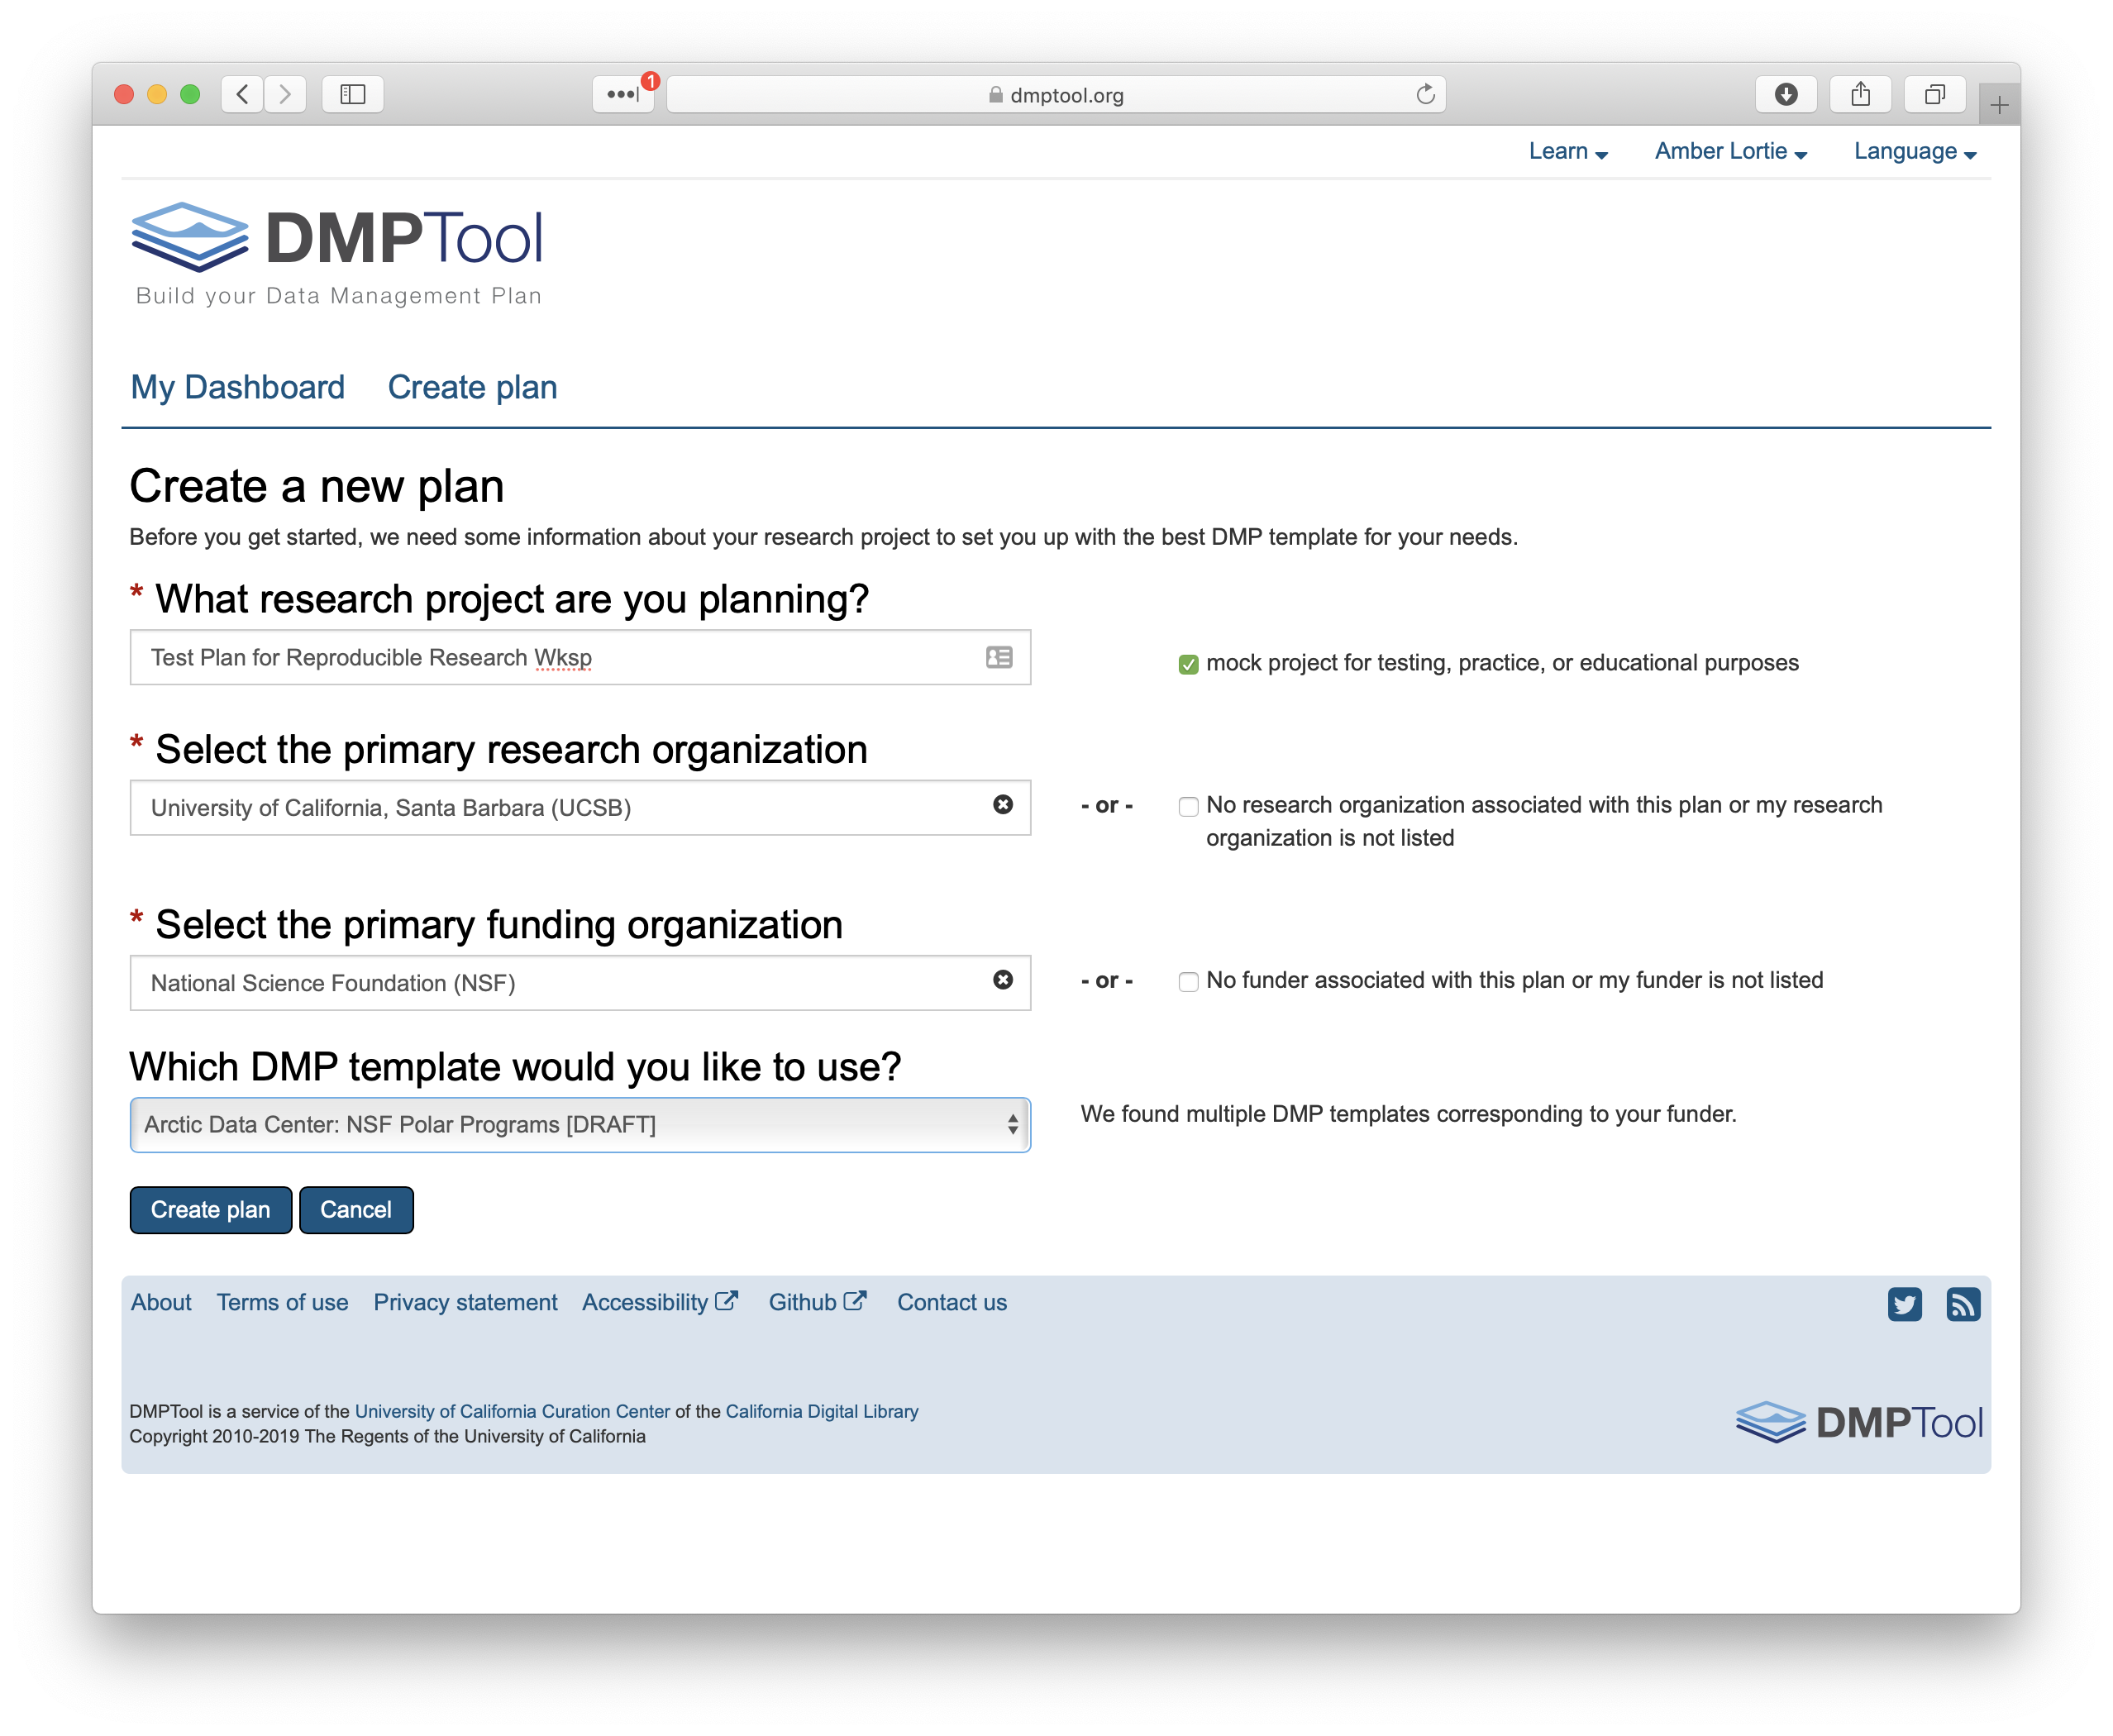
Click ‘Create Plan’. This will take you into the template and you will see five tabs - Project Details, Plan Overview, Write Plan, Share and Download. We will work through these now.
Project Details: Here we can provide more information about the project. For example, an abstract or funder grant number. As with all other fields throughout the tool, required answers are indicated by an asterisk. Note that you can add your ORCiD here. Since you would have logged in with your institutional ID, or created a specific DMPTool account, this field has not been filled automatically.
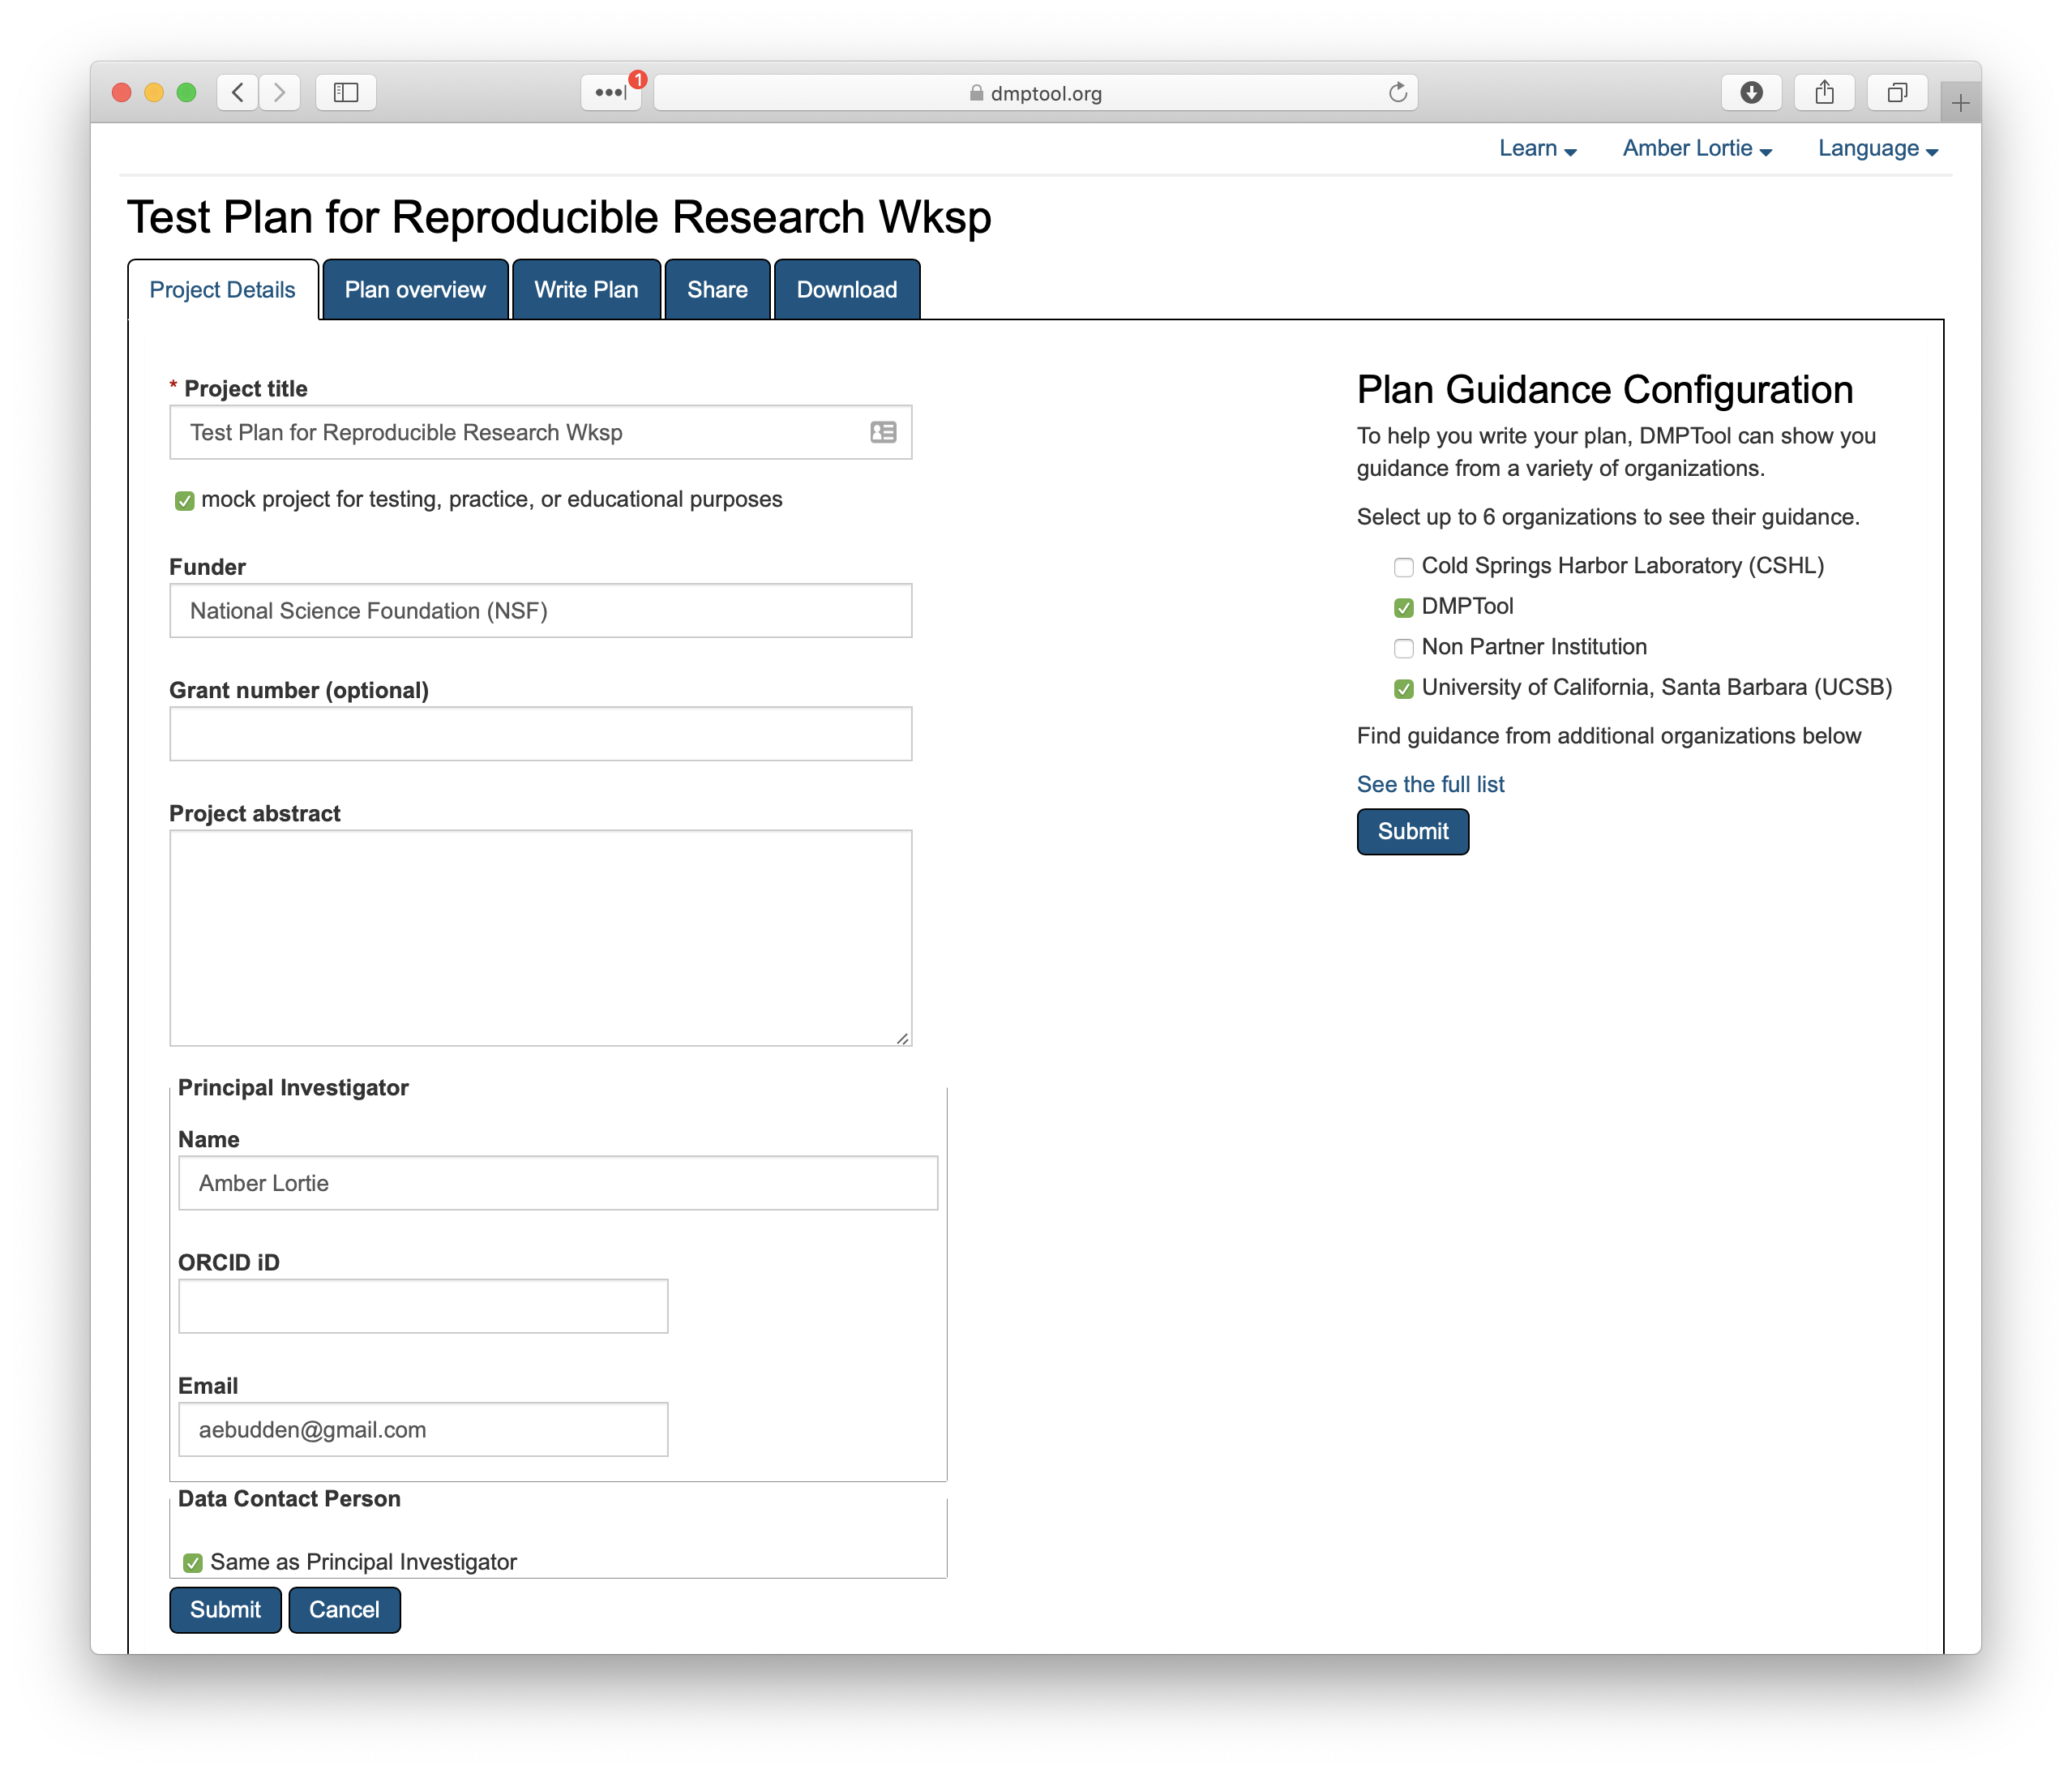
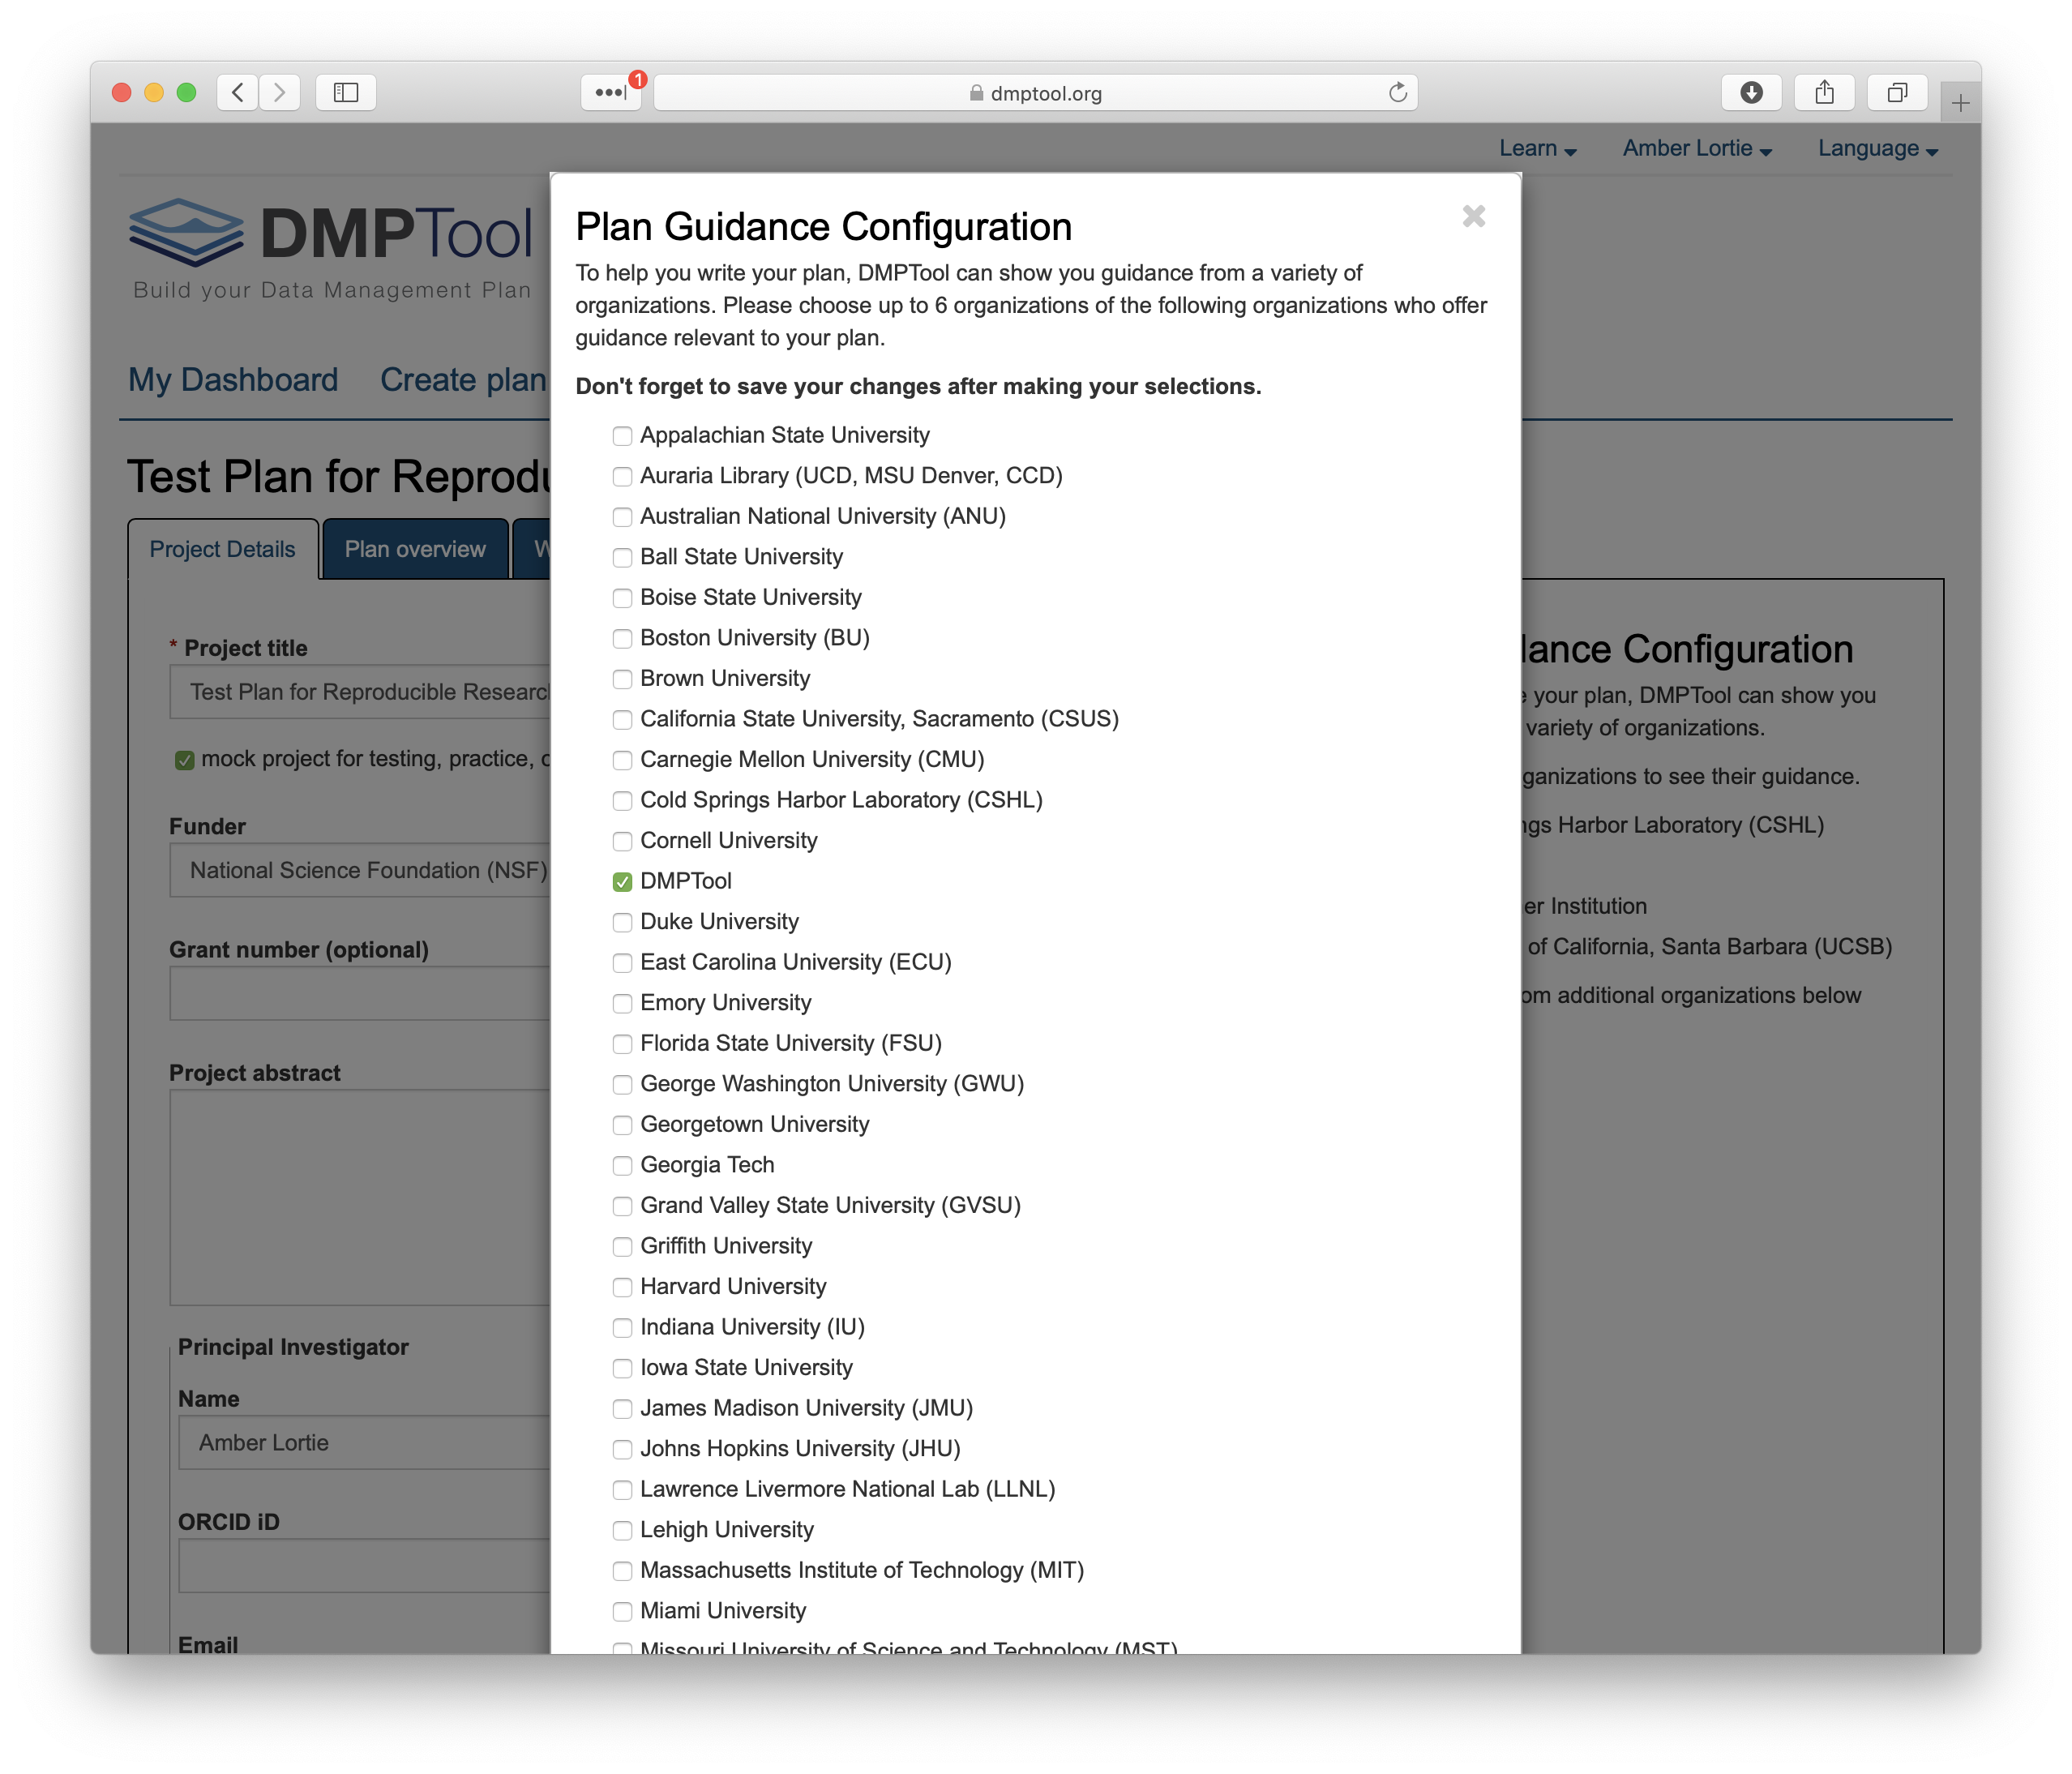
You will also notice on the right hand side that you have the option to include guidance from up to six organizaitons. By default, the DMPTool guidance and your institutional affiliation guidance is included. If you have collaborators at other institutions you may choose to add those by selecting ‘See the full list’.
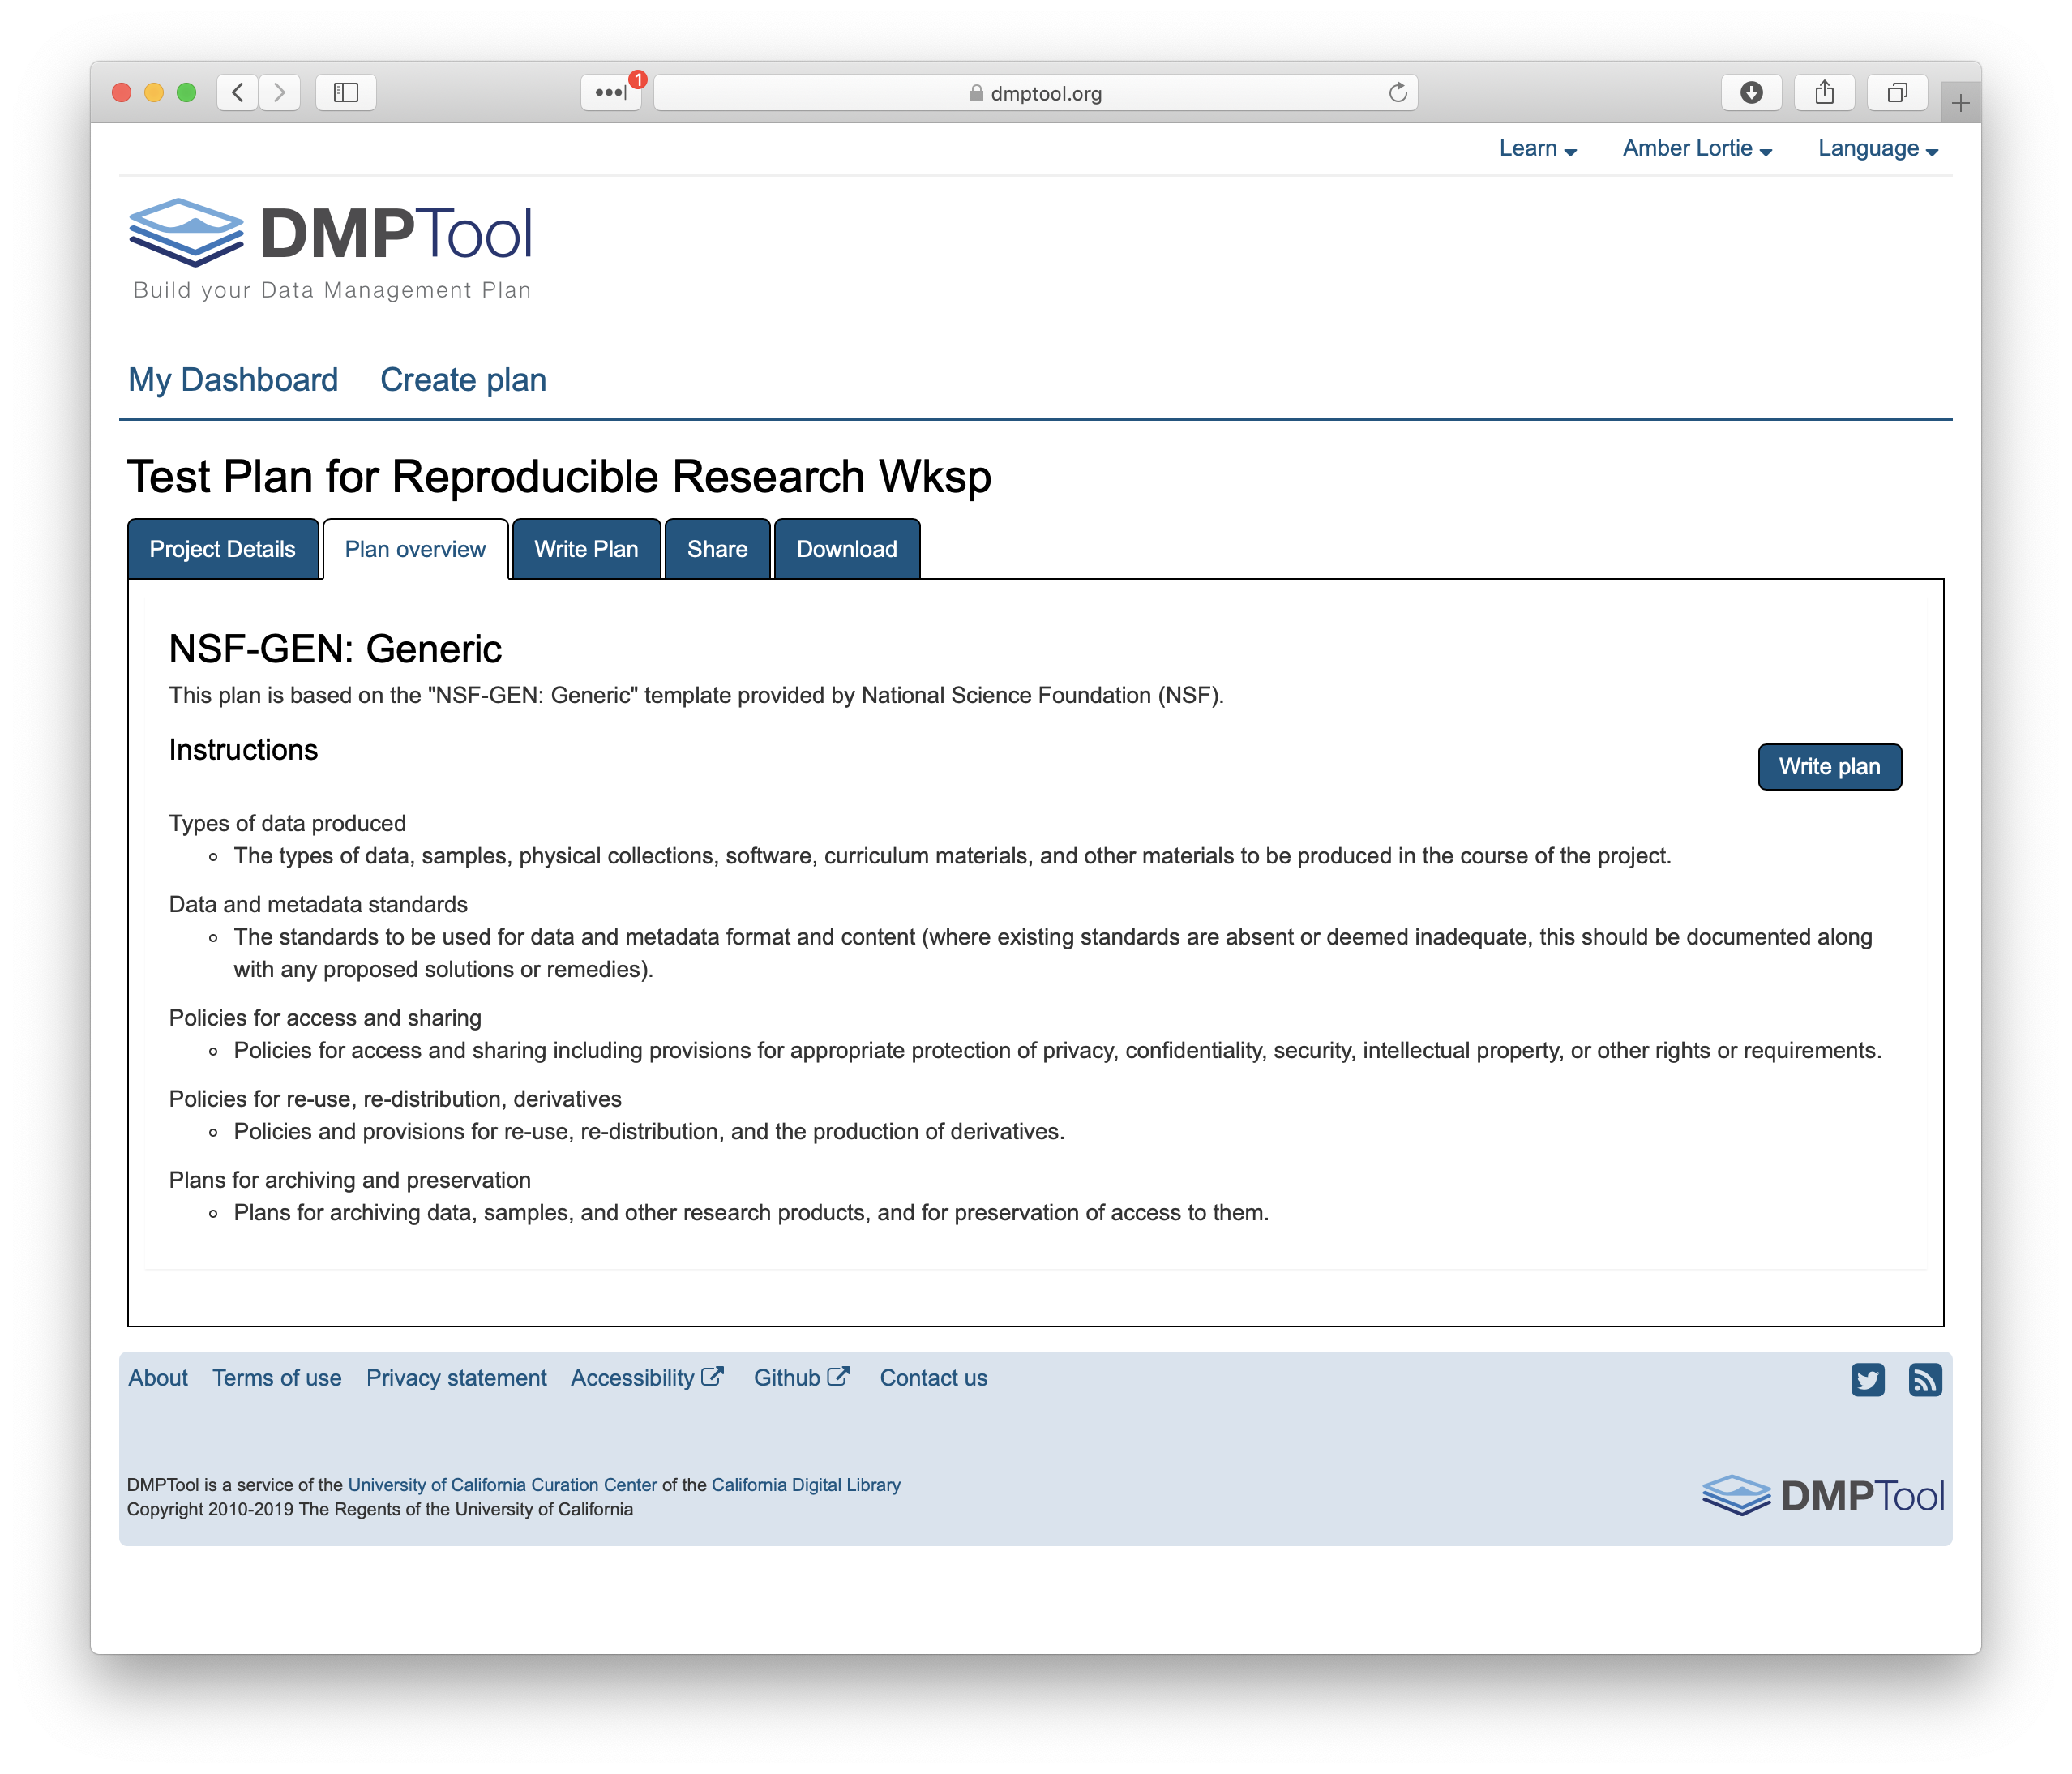
Plan Overview: This page provides a synopsis of the funder template. It’s a quick way to view what is going to be required when writing the plan. Note that in this example, there are five sections as we are using the NSF Generic template. You do not need to enter any information on this page and clicking ‘Write Plan’ will simply take you to the next tab.
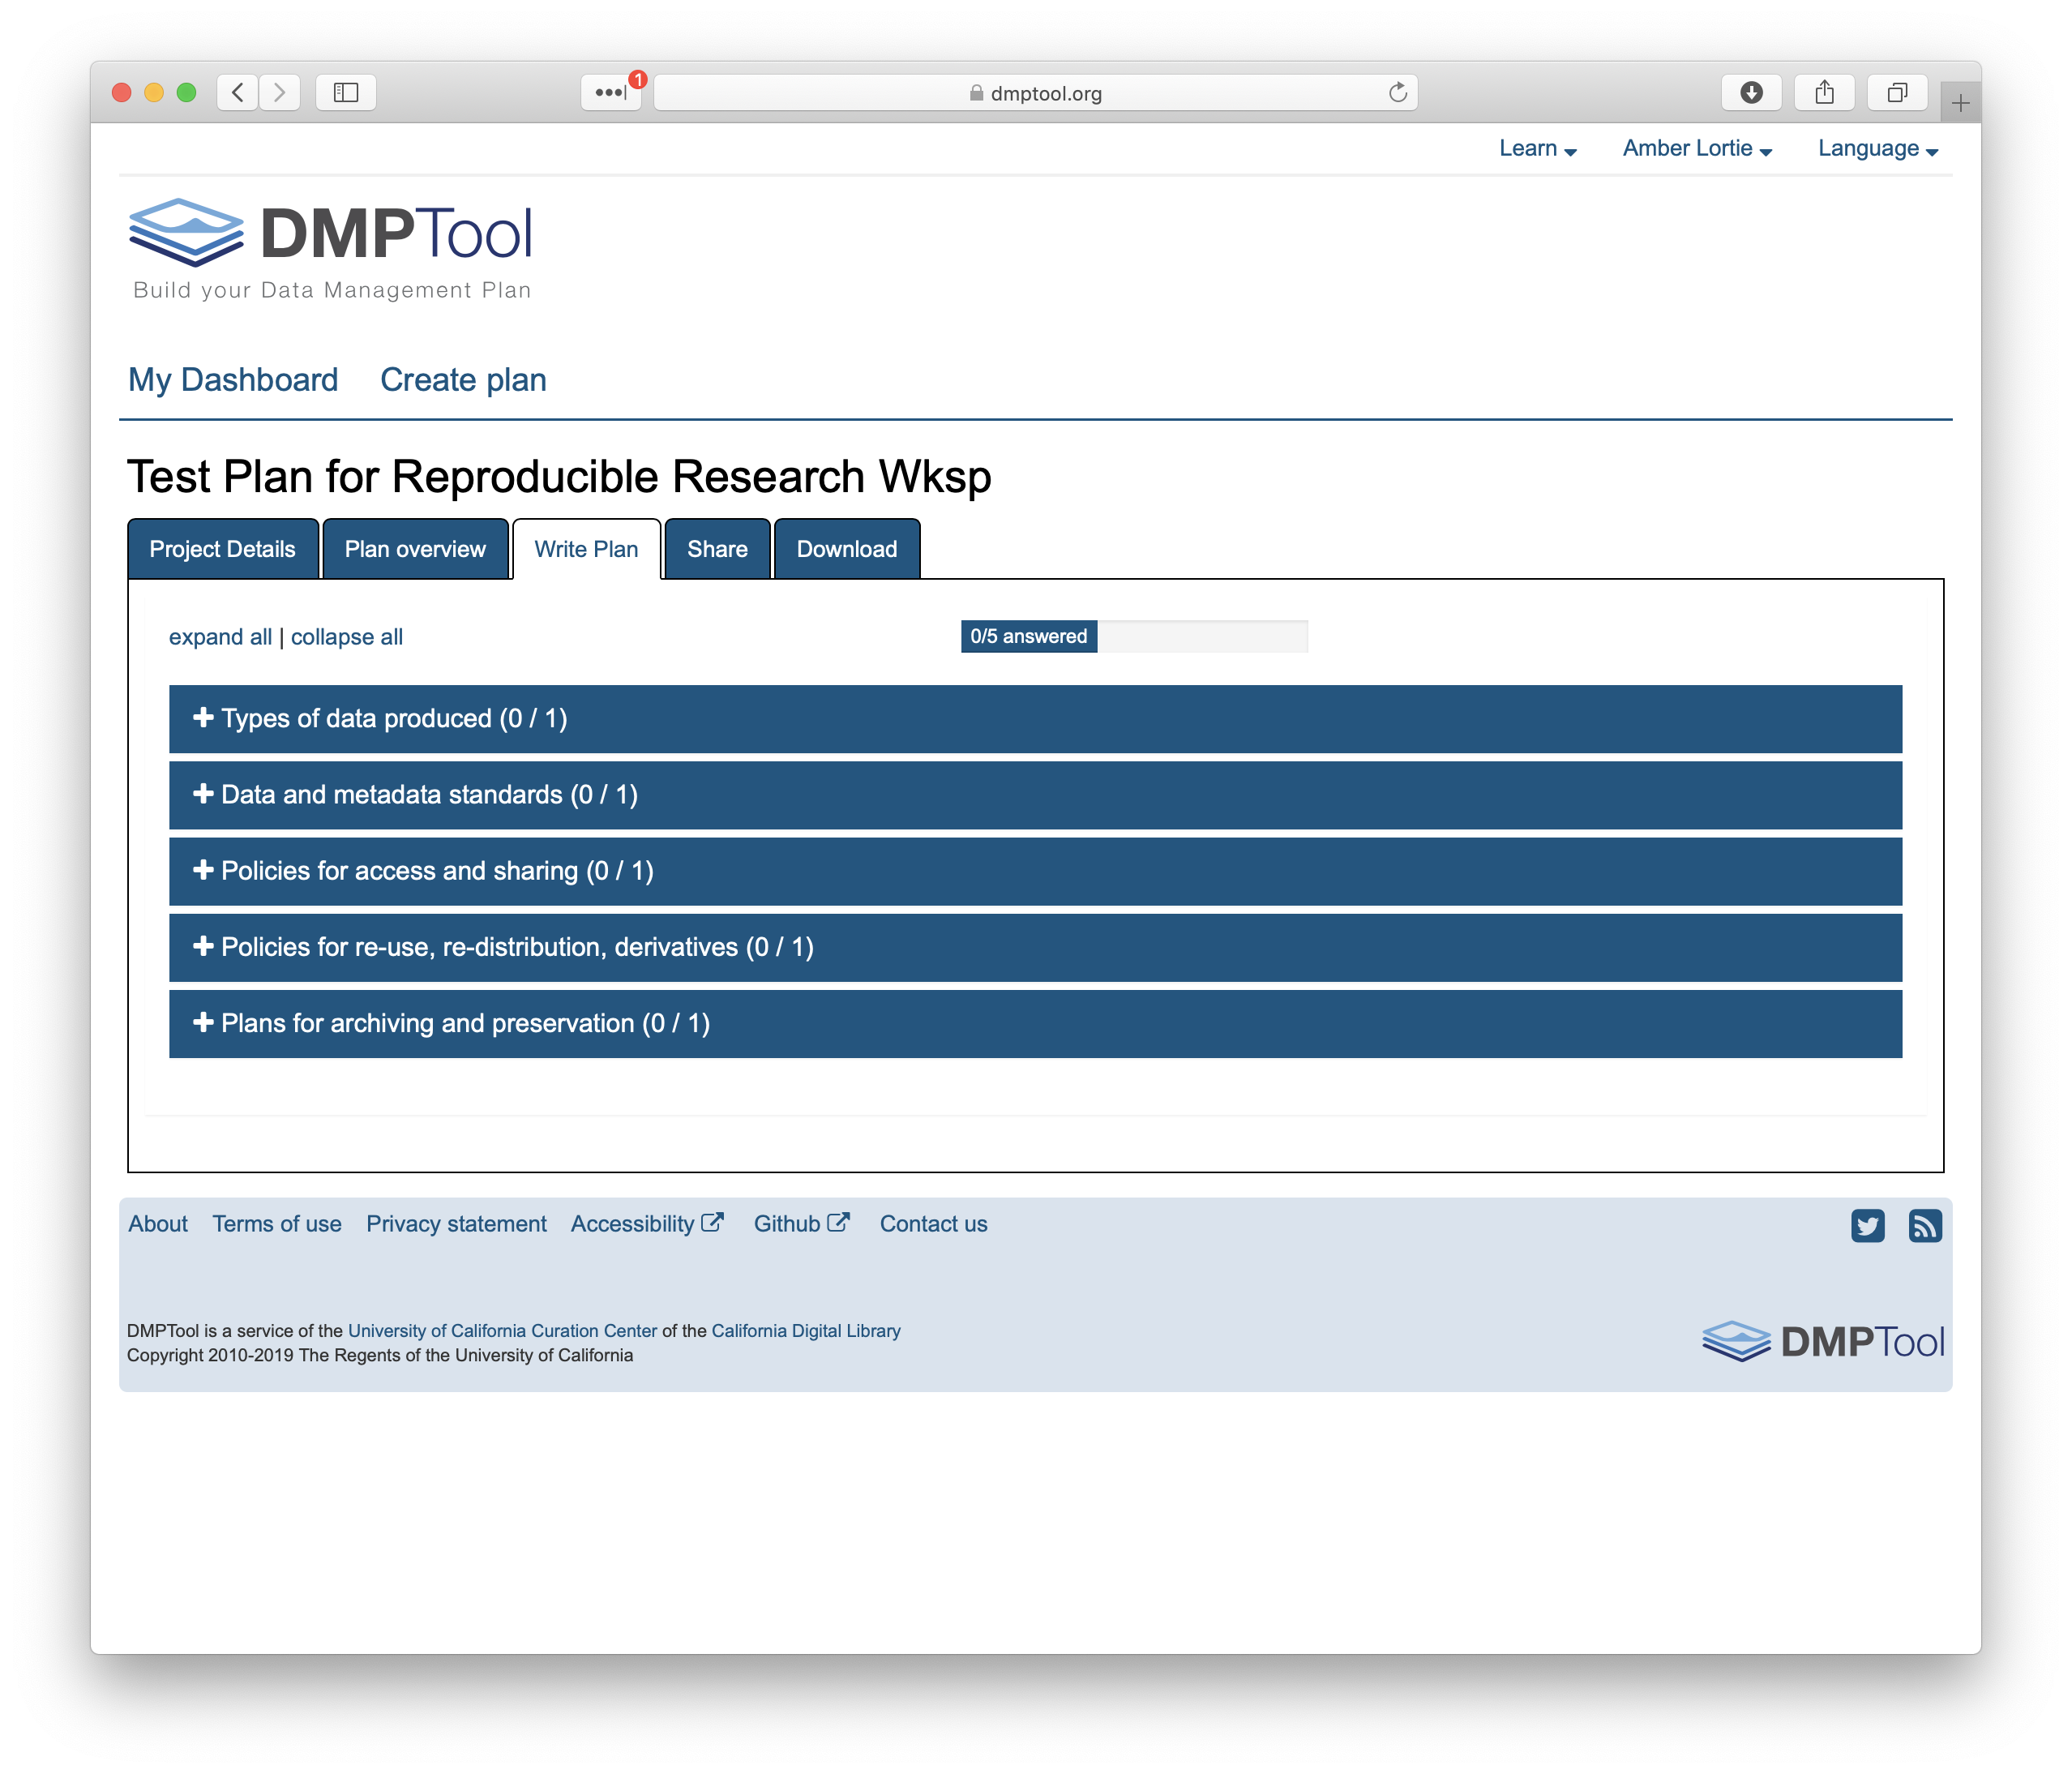
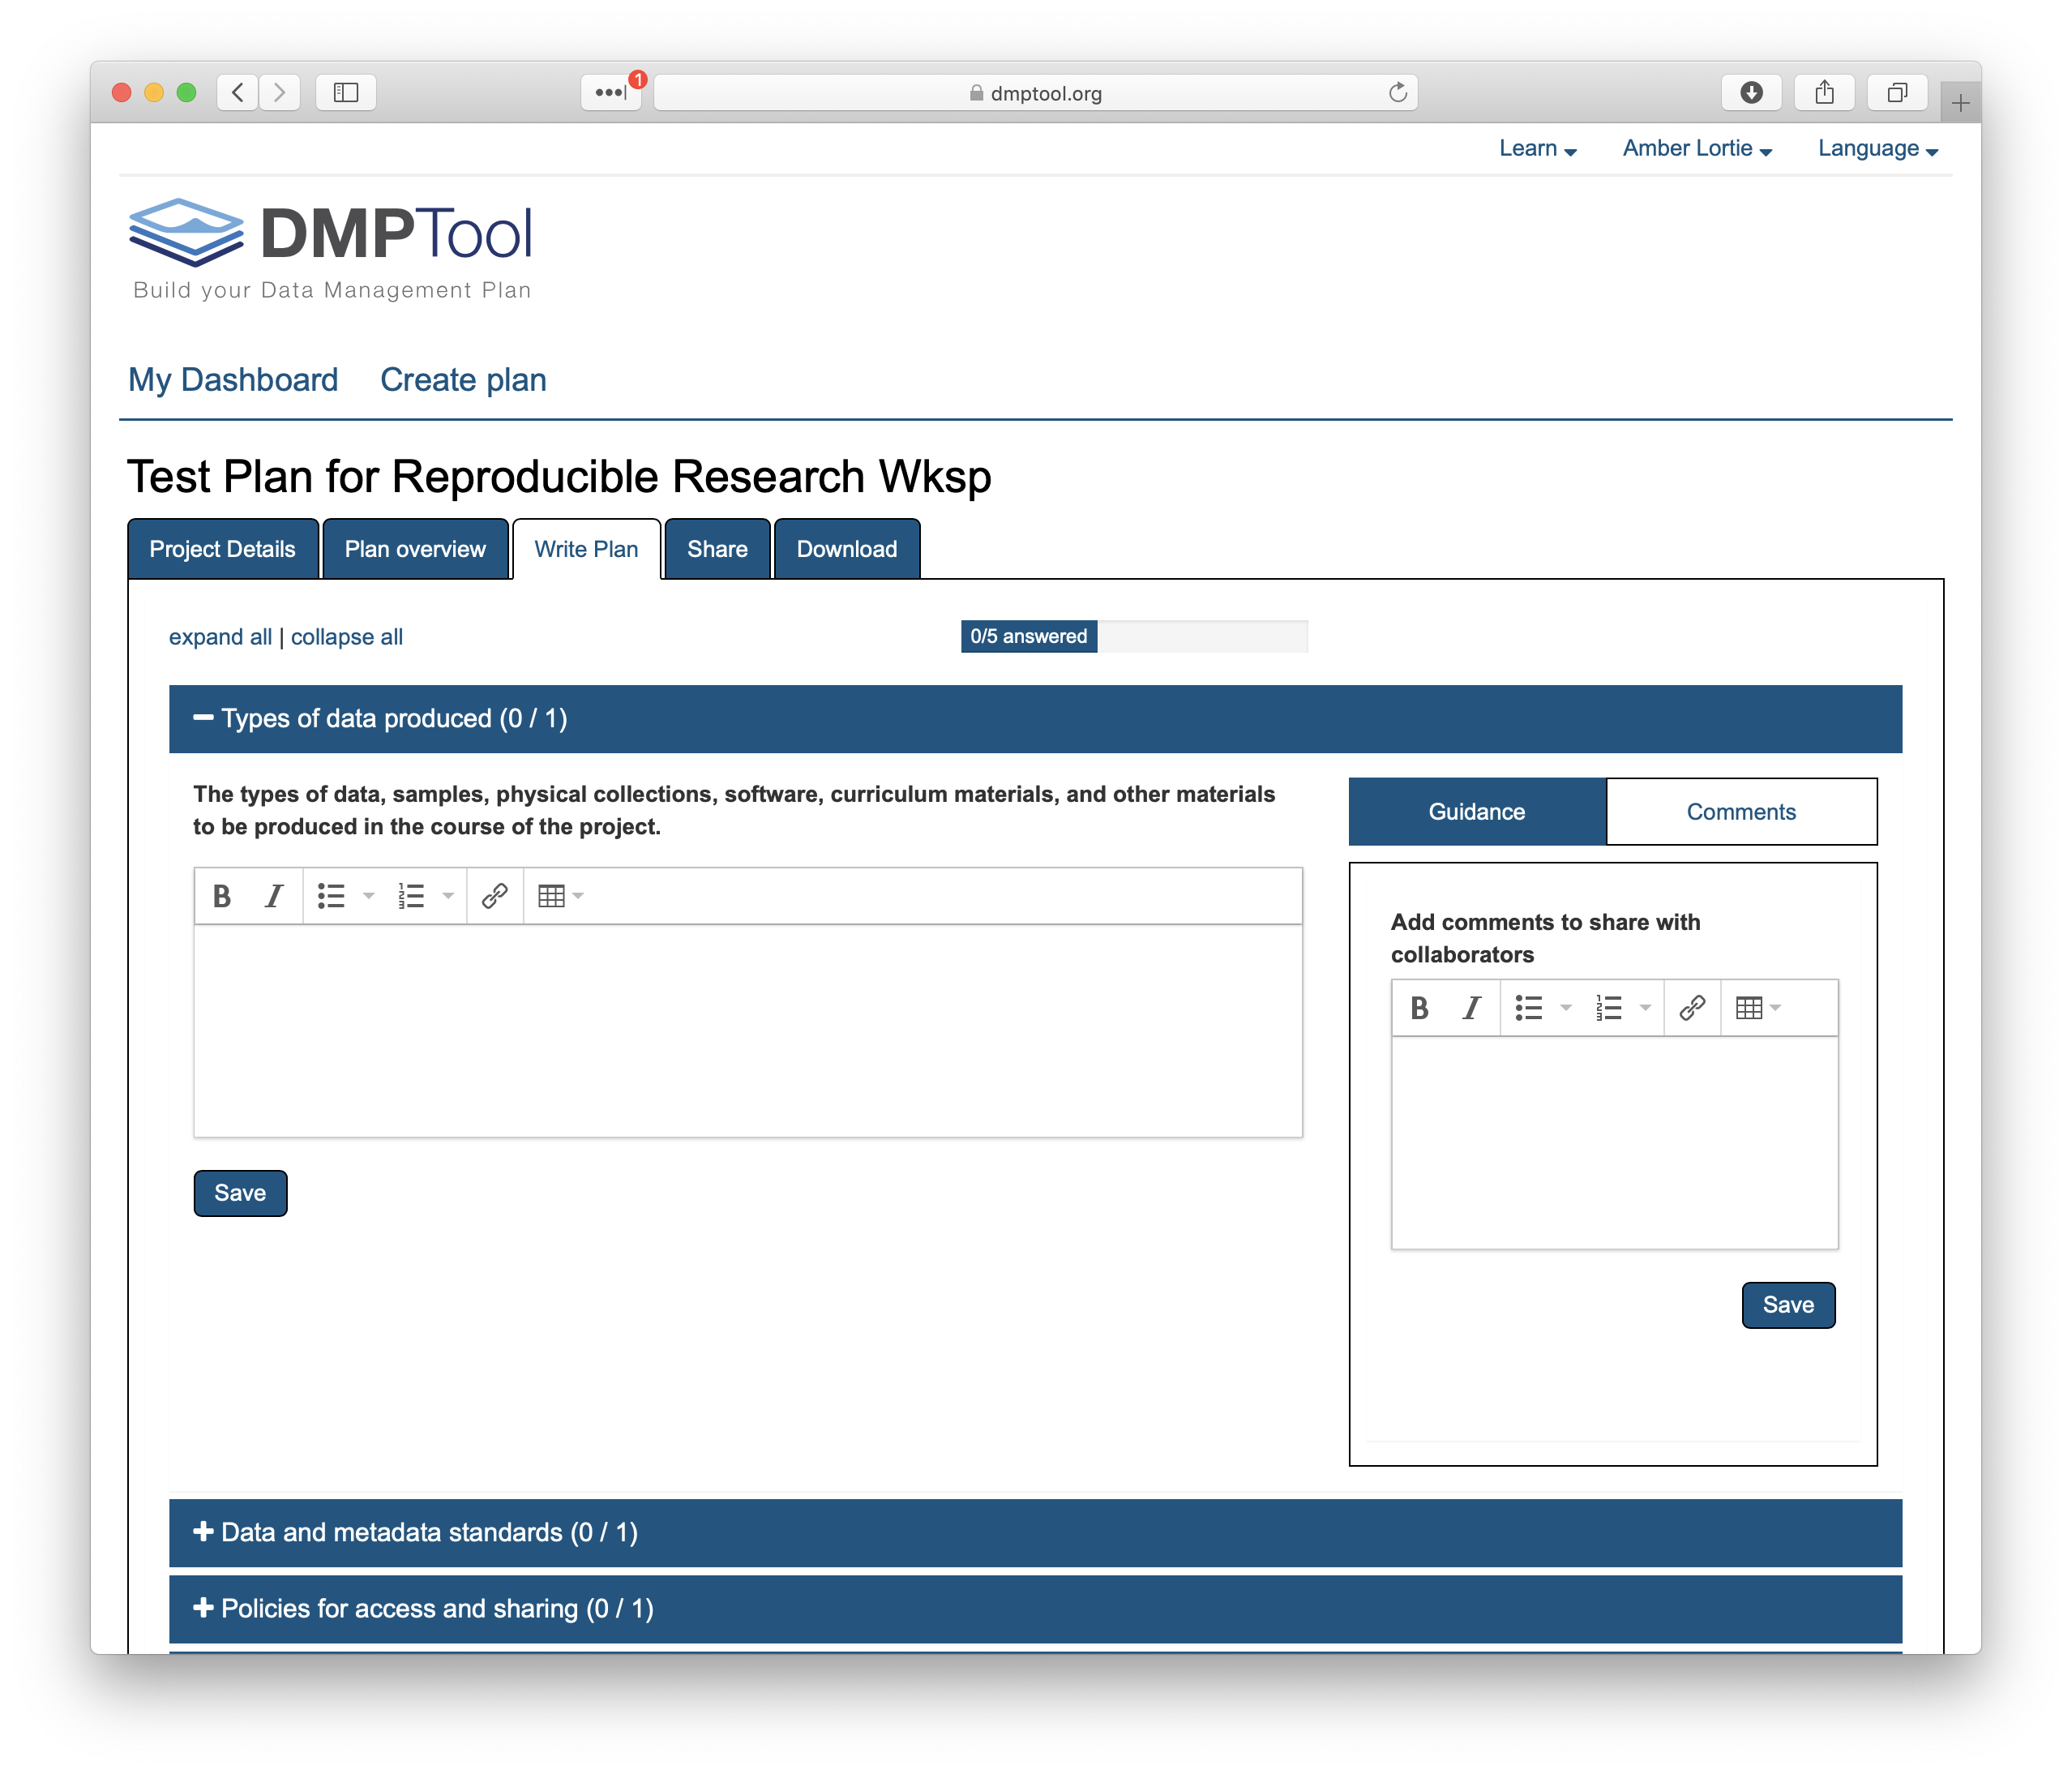
Write Plan: We now see those same five sections as expandable options. These are titled as before and the numbers in parentheses indicate how many questions are contained within each section and how many of those questions have been answered. Because we are just beginning, the first number in each case is 0.
I want to highlight that this page will look different according to the template that you are using. Different funding agencies / divisions / programs have different requirements for the data management plan. Therefore the template within the DMPTool may have more sections and more questions within each section. We are working through a simple, generic example. Below is an example for creating a DMP using the NSF Polar Programs Arctic Section template.
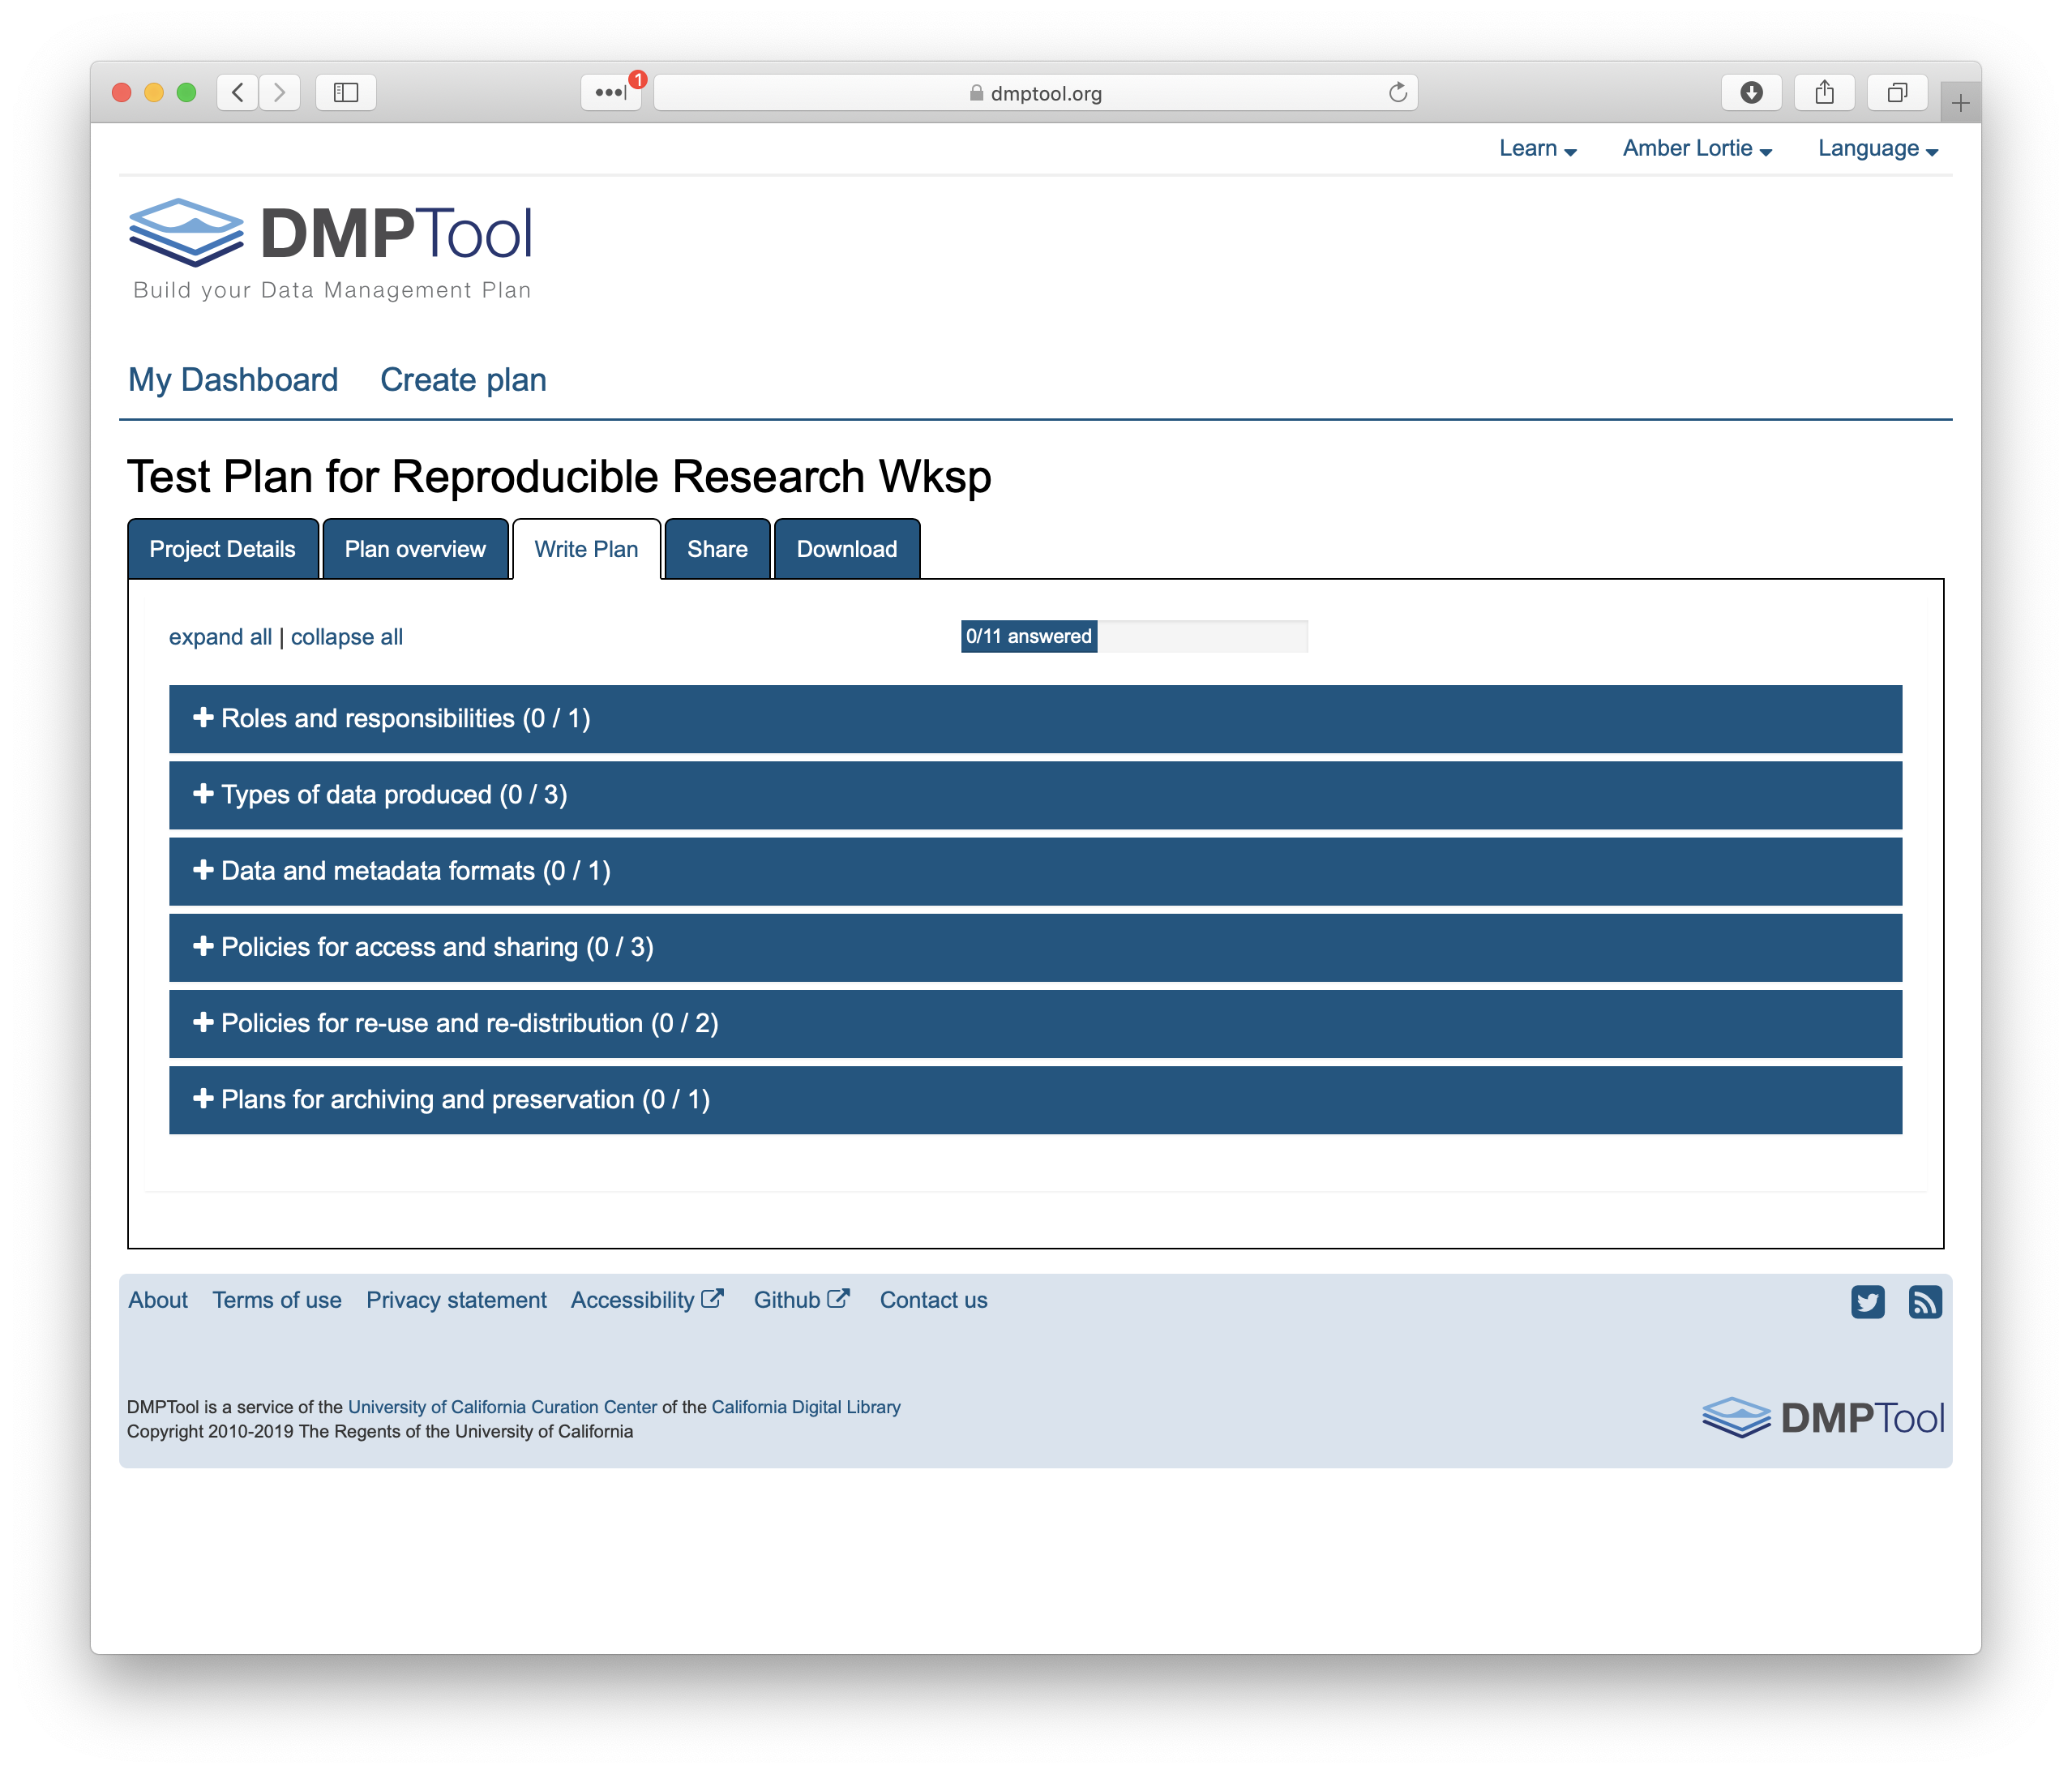
Back to the NSF Generic template.
Clicking on any + symbol within the boxes will expand to show the editing pane. You will see the full question with a text box below. On the right hand side is a box containing guidance. The tabs here represent the organizations that were selected under the Project Details step. They provide links to useful information and guidance.

Depending on the template that has been selected, there might also be an ‘example answer’ under the text box. It is not intended that you copy and paste this verbatim. Rather, this is example prose that you can refer to for answering the quesiton. The image below shows one such example when using the NSF Polar Programs Arctic Section template. This is one advantage of signing in through your institution and for institutions to partner with the DMPTool, they can provide specific example language and guidance for their researchers.
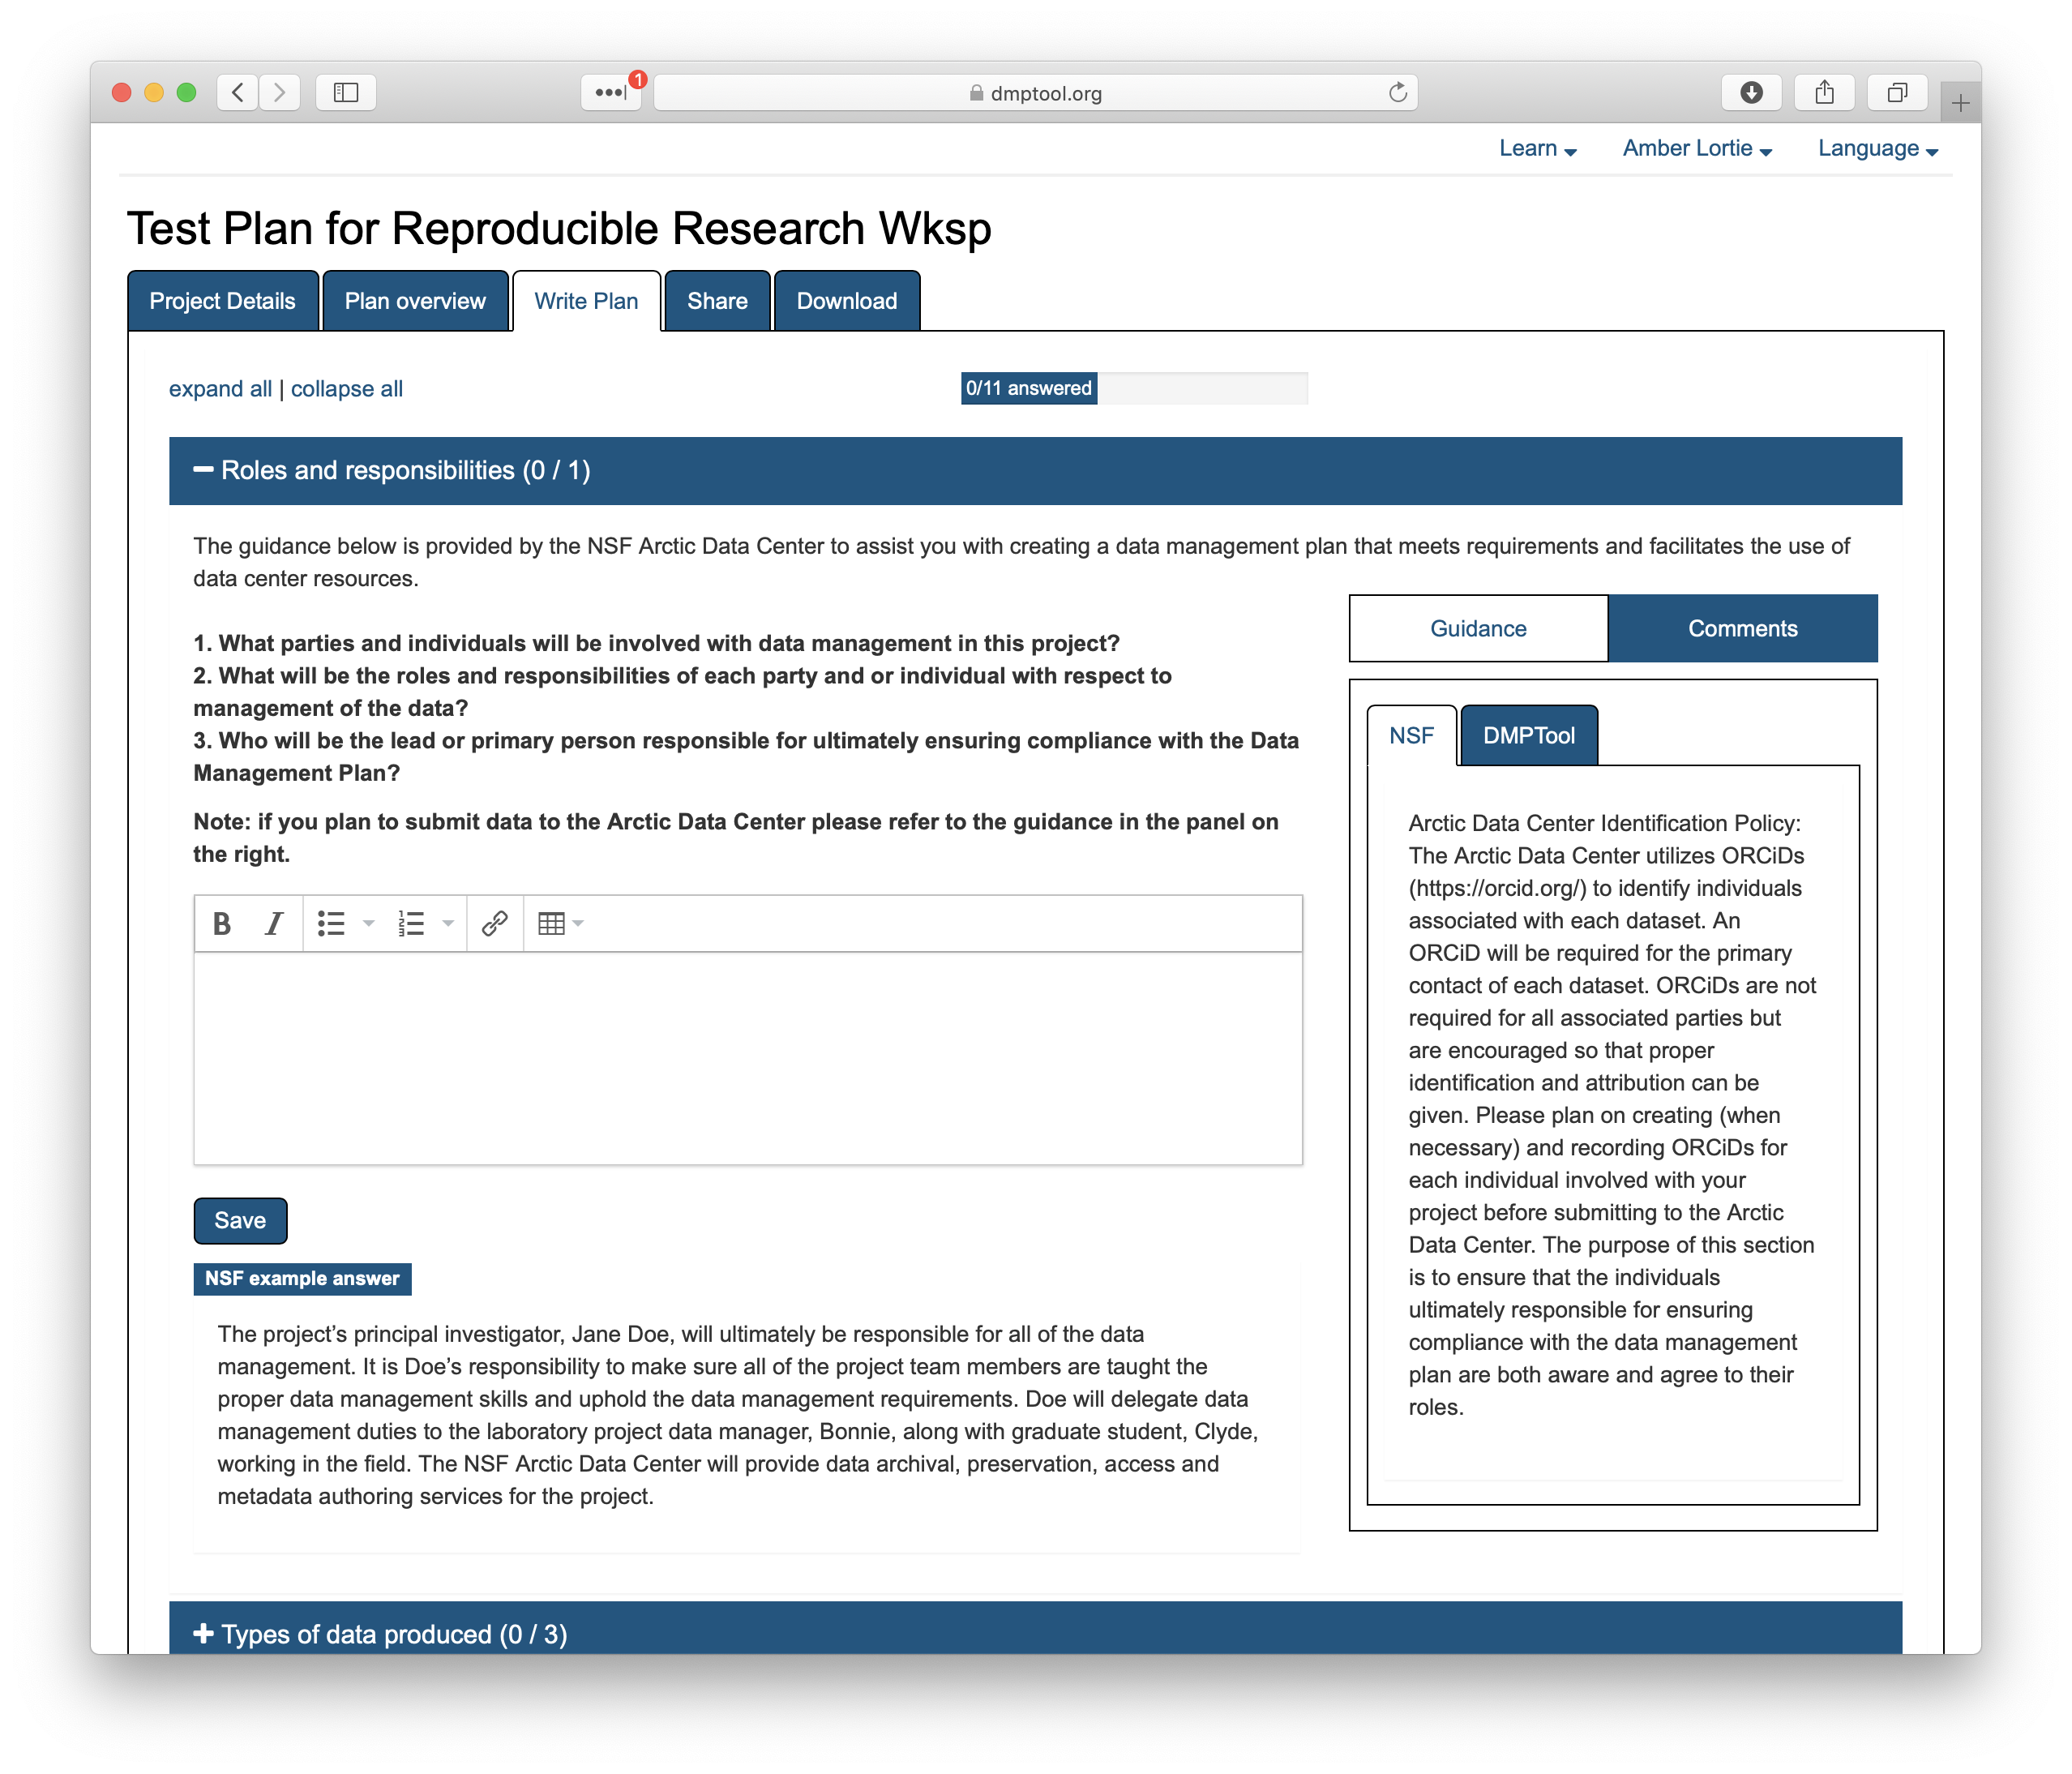
You will also notice a box for comments on the right hand side. In a moment you will see how collaboration can be managed. However, if you have shared your plan with others, this is where you will be able to see their comments.
There is no requirement for you to answer all questions in one sitting. Completing the plan can require information gathering from multiple sources. Saving the plan at this point does not submit the plan, it simply saves your edits and you can move between sections in any order by expanding the relevant pane.
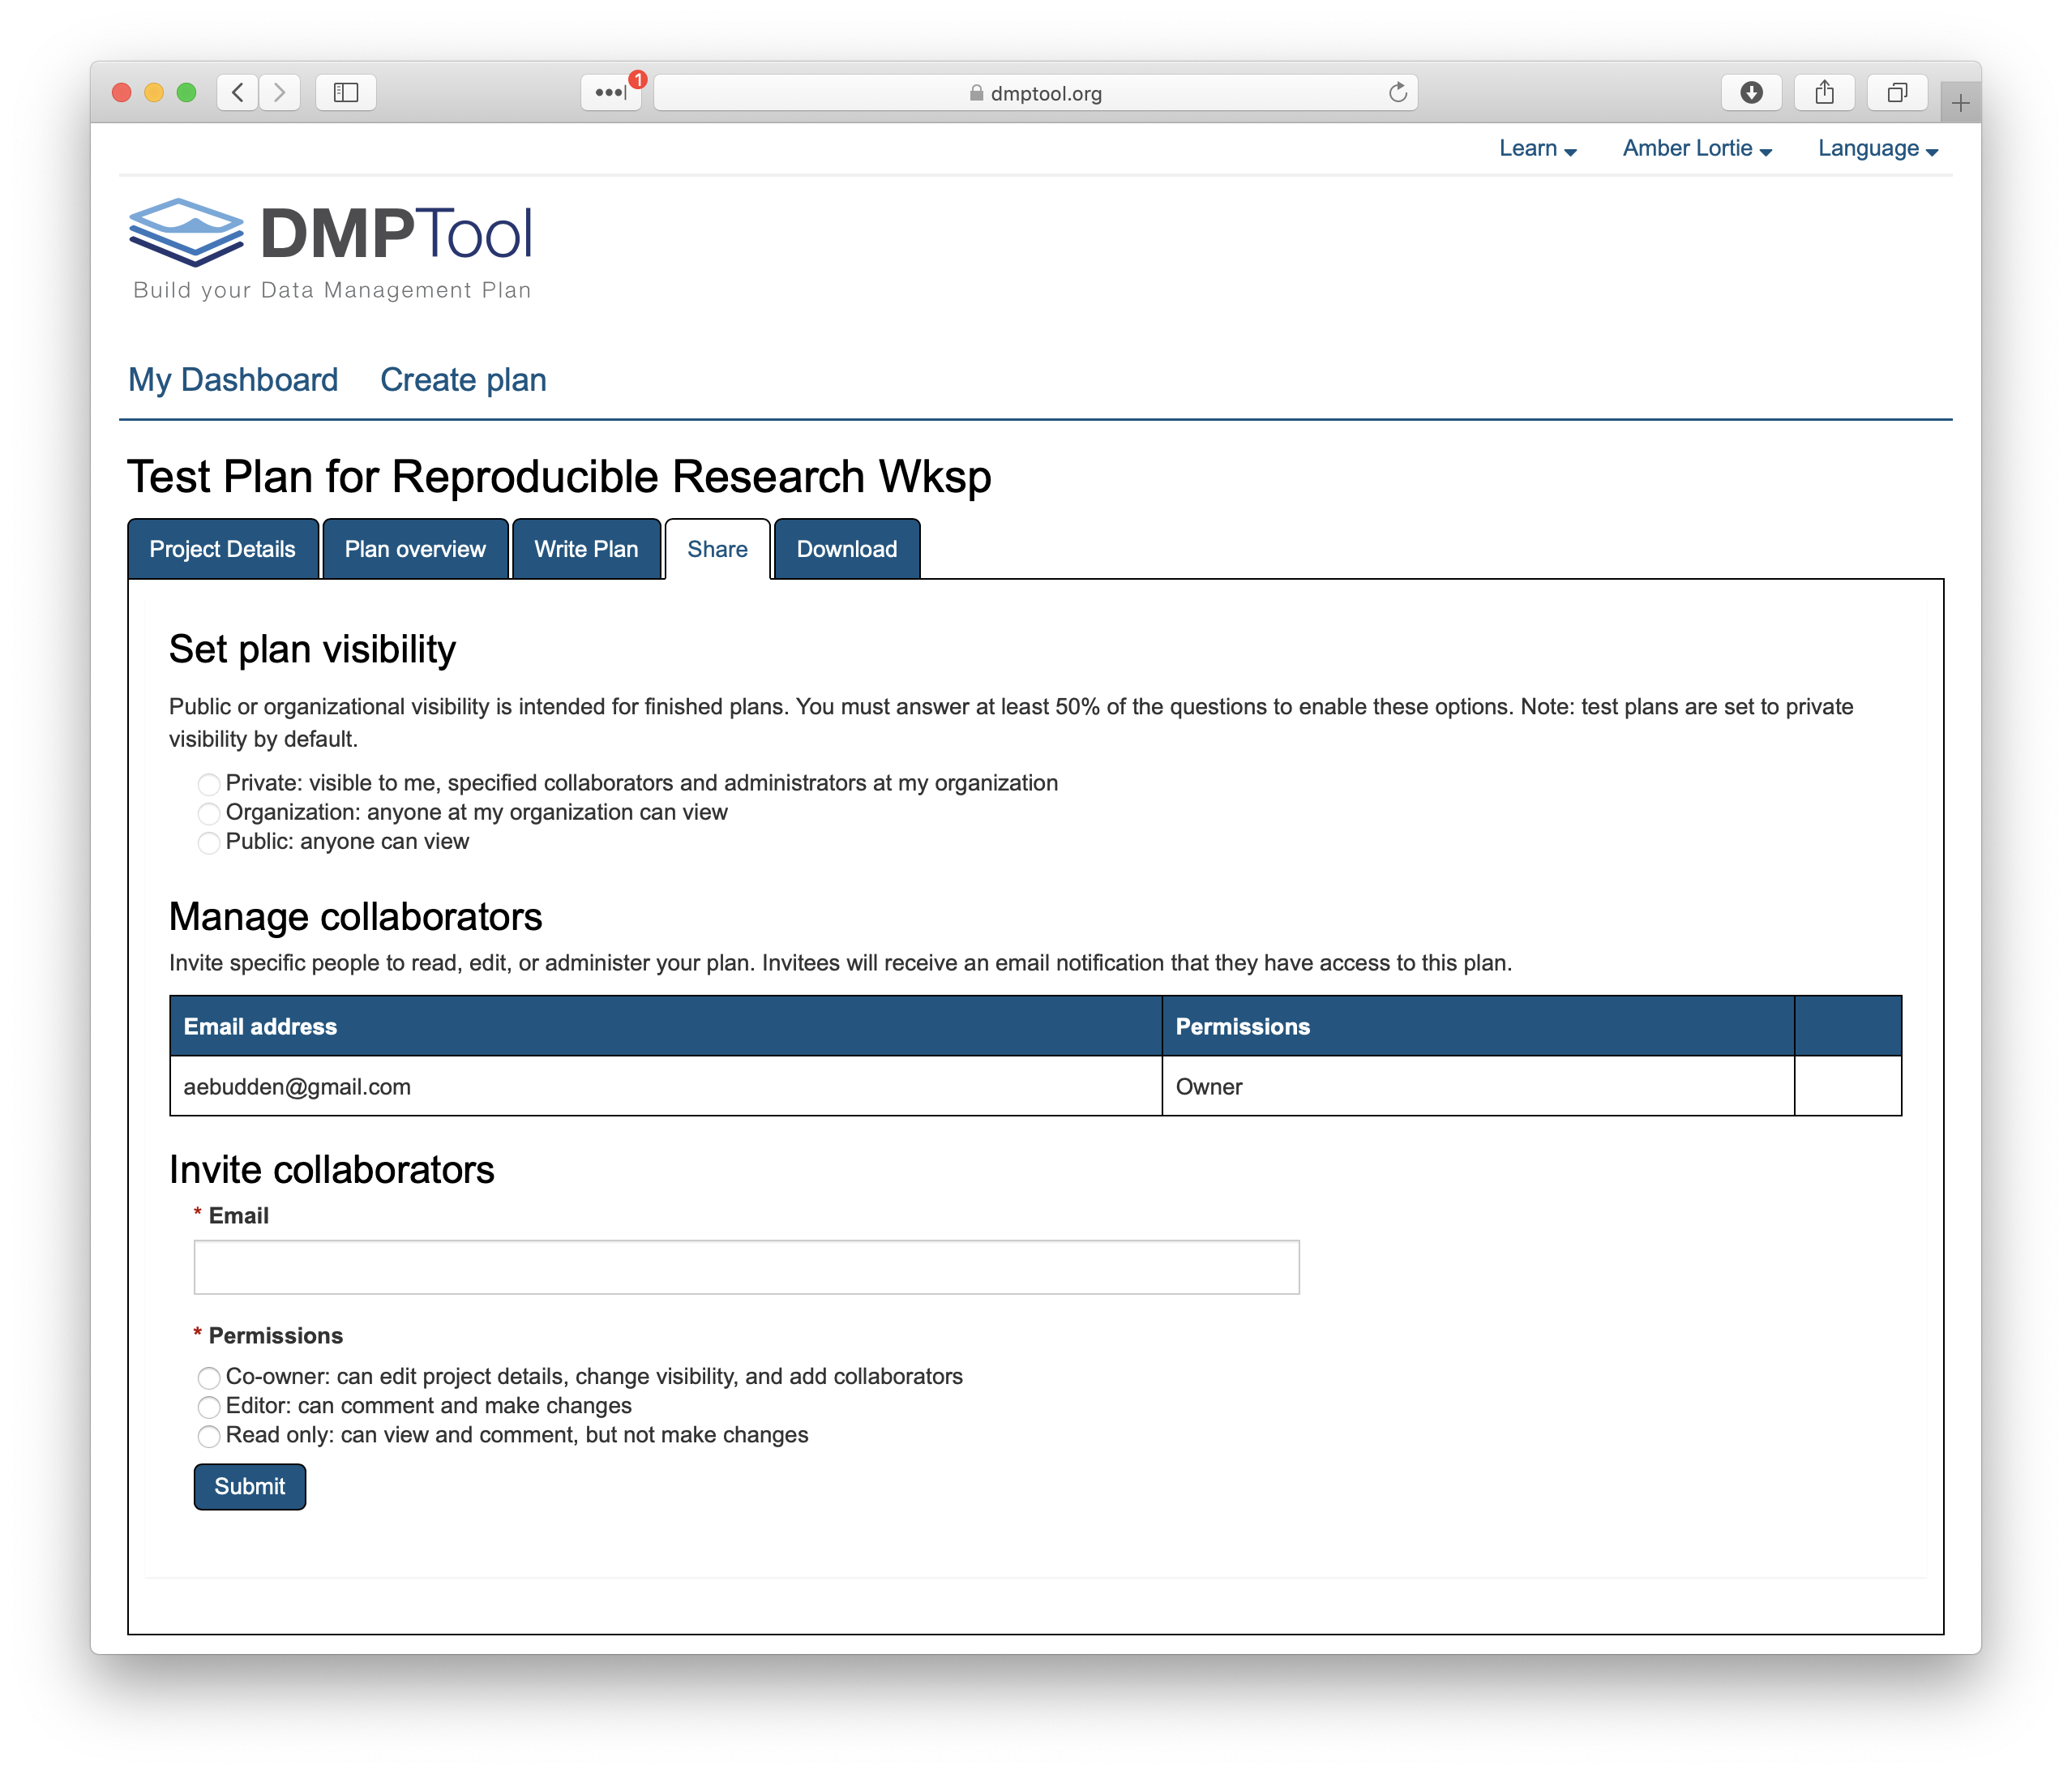
Share: Whether you have completed the first draft or not, you may choose to share your plan with others. The ‘Share’ tab lets you set up visibility preferences and manage collaboration. Under visibility you may opt for:
- Public: Your plan will be viewable by anyone visiting the site under Learn>Public Plans
- Organization: If you have logged in through an institutional ID, others logging in through the same institution can also view your plan
- Private: The plan can only be viewed by you and those you permit. The institutional administrator of the DMPtool account will also be able to view your plan. Typically this is a data librarian and their contact information will be at the top right of the webpage, under your institutional logo.
Note: You will notice that the above options are not available to you as you step through this exercise. This is because your plan is a ‘test’ plan and so will not be posted to the website or managed in the same way. You can go back to your dashboard and unselect ‘test’ at any point if your test evolves into a real plan.
For a private plan you can assign collaborators to three different roles:
- Co-owner: The collaborator can edit project details, change visibility, and add collaborators. They have the same privilidges as you.
- Editor: The collaborator can comment and make changes. Comments will appear in the tab indicated above.
- Read only: The collaborator can view and comment, but not make changes.
The advantage of collaborating through the tool vs sending emails back and forth is that the tool reflects the most current version at all times, it increases efficiency and keeps all commentary together.
Download: Here you can set your preferences for downloading your plan. The DMPTool does not submit your plan to your funding agency and so many researchers choose to download in text or docx formats so that they can make formatting edits to align with the rest of their proposal and meet page length requirements. You can do some of this formatting in advance using the options in this tab. Any plans that are shared publicly are shared in PDF format and include the project details coversheet by default.

Below shows the base template for downloading your plan (with no content included to date). You can choose to omit unanswered quesitons.

Finally, you can make changes to your plan at any point by returning to the dashboard. Here you can remove your plan from test status by unchecking the green box. You can also Edit, Share, Download, Copy or Remove your plan using the options in the drop down under ‘Actions’.
